www.theflowerbin.net

www.theflowerbin.net

Tuesday, September 24, 2013


Forcing spring flowering bulbs indoors.


Forcing bulbs is a great way to bring a little spring color into the house, while its still winter outside. To force a bulb is to get the bulb to flower indoors ahead of its natural schedule. Forcing bulbs indoors is easy to do and virtually all spring flowering bulbs can be forced, tulips, hyacinths and daffodils. Amaryllis and paperwhites are popular holiday bulbs that do not need a chilling-off period to bloom.
Bulbs will grow equally well in clay, ceramic or plastic pots, as long as the pot has drainage.
 
 
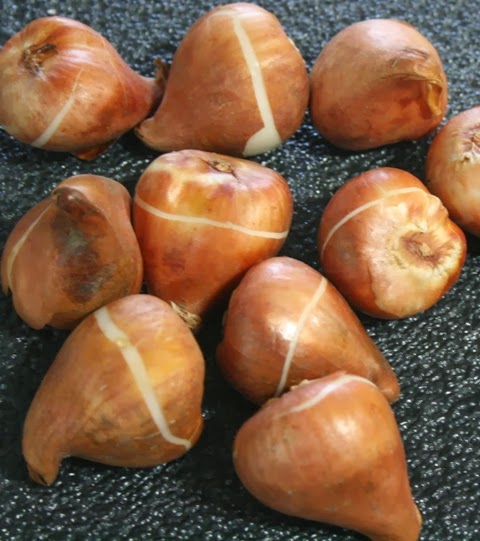
Next, select quality bulbs. The larger the bulb, the bigger the bloom will be. Fill the container about 3/4s full of quality potting soil. Add Bone Meal or Dutch Bulb Food to your potting mix. Bulbs that are forced can be planted outside after blooming and the fertilizer will give them an extra boost.
 
 
Place the bulbs close together, but not touching each other. Tulips should be placed with the flat side of the bulb toward the edge of the container. This will allow the first leaves to form a nice border around the edge of the pot.
 
 
Fill in enough soil so just the tips are showing. Water the soil. Place the pot in a cool (35°-45°), dark spot such as a spare refrigerator, unheated garage or basement. Spring flowering bulbs require 12 to 15 weeks in cold storage in order to bloom.
While the bulbs are chilling, they will form roots, so it’s important to water regularly. Once the tips of the bulbs are about 2” high, remove from cold storage and place in a warmer room, with bright, indirect sunlight. Your bulbs can now be treated as any houseplant, water regularly, feed weekly and enjoy your blooms! After blooming, remove the spent flowers. Bulbs may be planted outside after blooming.
Hyacinths can also be forced in water several ways. Select a forcing vase, add water and set bulb in the vase and into a cool spot. Roots will form over the next 10-12 weeks. Another way is to chill hyacinth bulbs in a paper bag in the refrigerator, then place the bulb in a forcing vase and set in a sunny, warm spot and enjoy the flowers.

Tuesday, September 17, 2013


Garlic is a member of the allium family, which includes leeks, shallots and onions. There many different varieties of garlic, all of which fall into three general categories: Softneck, Hardneck and Elephant. Softneck garlic is the kind you will generally find in the grocery store. The two common types of softneck garlic are artichoke and silverskin. Artichoke garlic generally stores well and has a mild flavor, such as Inchelium Red and Early Italian Purple. Silverskin includes Silver Rose (warm flavor), Italian Late (very aromatic with robust flavor) and Nootka Rose (very strong flavor). Softneck garlics have a flexible stalk which can be braided.


Hardneck garlics also have a stalk –called a scape- which coils at the top. If left to mature, hardnecks will produce a flower which is actually a number of small bubils, or tiny bulbs, which are edible. Hardnecks dry to a hard stem, hence the name. The most common Hardneck garlic is rocambole. As a group, they have a deeper, richer flavor than softnecks do, but they don’t store as well. Select German Red or Spanish Roja for long lasting, strong flavor.

Elephant garlic is the largest garlic. It is also the mildest and sweetest. It is easy to peel and has a long shelf life.

Garlic is typically planted in late September and early October. Start with a good, quality bulb. Garlic purchased in grocery stores is often treated with sprout inhibitors, disrupting the growth cycle.
 
 
 Break the bulb, called “cracking” into individual cloves. Each clove will produce its own plant, containing 6-8 cloves per bulb. Garlic likes sun and well-drained soils, so incorporate a good soil amendment such as Sheep, Peat and Compost into your planting. This organic soil is produced locally. Add some Bone Meal to the planting site, to encourage rooting. Garlic is a very friendly plant and grows well planted with other flowers and vegetables in the garden as well as in the perennial bed. Plant each clove about 2” deep, pointy end up and spaced about 6” apart.

Like other spring flowering bulbs, garlic planted now will set roots and start to grow. As the soil temperature cools down, growth stops. As soil temperatures increase in the spring, the bulb begins its growth cycle. Garlic can be mulched in early winter, after the ground freezes. The mulch will hold in moisture and keep the ground stable.   

Softneck garlic planted now will usually be ready for harvest around July 4th. Dig softnecks when the leaves turn brown. Hardnecks will mature a little later in the season. Hardnecks are ready to dig when the scapes become straight.

Tuesday, September 10, 2013


Check the plants thoroughly for any problems. This would include looking for signs of insects or disease. Inspect the top and bottoms of leaves and along the stems. You’re looking for things like sticky residue on leaves, holes in leaves, yellowing and discoloration. Remove any leaf litter from the top of the pot, as insects can hide under the debris. It’s much easier to correct problems while the plants are outside. This is also a good time to prune away any damaged leaves.  


If you decide treatment is in order, select a product that matches the problem. Some products target insects only, such as Safer® Insecticidal Soap. Others, like Fertilome’s Triple Action will treat insects, mites and diseases. If you’re not sure, bring us a sample. We’ll identify it and help you select the right product to apply.

Next, take the hose and wash the pot and plant. Do this in the shade, not in direct sunlight. Dry the pot with a towel and look for signs that your plant needs to be repotted. One clue would be roots sticking out of the bottom of the pot. Another way to tell is to gently slip the plant out of its pot and look at the root ball. If the roots are pushing up against the sides of the pot, it’s probably time to repot. In general, move up one pot size.
The new pot should be 1” to 2” wider or deeper than the old pot. A 6” pot could be upsized to a 7.5” pot (as shown). You can choose between clay, ceramic or plastic pots,  but pick one with a drain hole. No matter how careful you are, water will build up and the plant will suffer.  Skip adding rocks or pottery shards to the bottom of the pot. It won’t help the drainage.

Select a quality potting soil. This is a healthy blend designed to encourage strong roots and good drainage. Partially fill the new container with this potting soil. Center the plant in the pot and fill in the sides with more potting soil, as needed. Water thoroughly. You’re now ready to bring your plants inside.

As always, if you have a question, if you’re not sure how to do something, stop in and see us. We will be glad to help you.


Tuesday, September 3, 2013

Some pesky garden things to watch for now.


As temperatures start to cool down, insect activity can increase. Here are several insects to watch for in your garden this time of year.

Pear slugs eat the leaves of pears, cherries, plums, cotoneaster and others. The adult is a glossy black sawfly; it lays eggs in the leaf, which become slug-like larvae. What we’re seeing now is the second generation, which is generally more destructive. Some of these larvae will over-winter underground and emerge next spring to start the cycle again. Control with Sevin or Spinosad.

Aphids come in many colors, not just green. They cause direct damage to plant leaves and they can transmit diseases to the plant.  Apply Neem Oil or Eight, to control.

Wasps and aphids can go hand in hand. If you see a lot of wasp activity in trees, check for aphids. The wasps are there because of the secretions (honeydew, sugars) which the aphids produce. Get rid of the aphids and the wasp problem will be reduced. Also, keep your wasp traps baited and look for the wasp’s nest nearby. Spray late in the evening or early morning.
 Leaf Hoppers show up now,  particularly on tomatoes and grapes, causing leaf damage and reducing fruit quality. Look for blotchy leaves with white spots. Control with Sevin®


Garden slugs can commonly be found under mulch, boards, pots and overgrown vegetation.  Pull mulch back from plants, prune leaves that are close to the ground, apply diatomaceous earth or Sluggo®.


Not sure what’s bugging your plants or lawn. Bring a sample to the Flower Bin Diagnostic Center for identification and control options.