www.theflowerbin.net

www.theflowerbin.net

Tuesday, June 30, 2015

Bellflowers bring color to your summer garden


Bellflower is the common name for a group of plants with bell shaped flowers known as campanula. Campanula takes both its common name and its scientific name from its bell shaped flowers. Campanula is Latin for “little bell”.

Campanula colors include blue, 
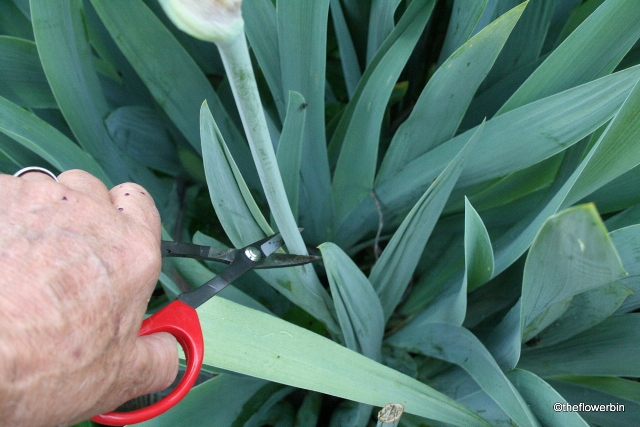
violet, purple and white. Campanulas generally begin to bloom in late spring and continue through the summer, into fall. Removing flowers that have faded or died will encourage more blooms.
Regular fertilization with a balanced fertilizer such as Fertilome 20-20-20 every 10-14 days will help bloom production. Campanulas are a very diverse group of plants. They can be grown in pots on the patio, as groundcover and in perennial beds. They do best when planted in full sun or dappled shade. As with any plant, your success with campanula will depend on the quality of your soil, so take time now to amend your existing soil with compost and peat moss, mixed 50:50 with your native soil.
In addition to their beautiful flowers, bumblebees and other pollinators are attracted to campanulas.
Some campanula choices for your garden include:


Blue Rivulet

Milan Blue

Milan Lilac

Blue Bell

Bells of Scotland

Garganica

Tuesday, June 23, 2015

How to prune garden mums


Now is the time to pinch back hardy garden mums for more fall color. Many garden mums are flourishing while others are showing the effects of last November’s dramatic temperature fluctuations. A few garden mums didn’t come back at all. You can choose to leave your garden mums alone and they will begin blooming soon.  If you want them to bloom later in the season, it’s time to prune them.

 Cutting or pinching off the top of the stem encourages the plant to grow two stems in its place. This will keep the plant more compact and should produce more flowers.
As you look at your garden mum, you may find that it’s starting to show small flower buds already.  Several buds grow off each stem.
You’ll want to make your cut or pinch at the base of the stem. If your plant doesn’t have buds yet, the new foliage will be at the top of each stem. It will be a lighter green then the rest of the foliage.

Pinch this or cut this off at the base. The rule of thumb is to not prune mums after the Fourth of July, so there’s time for flower buds to form and bloom.
After pruning, you can feed your garden mums with some 11-15-11 fertilizer, such as Fertilome‘s  Gardener’s Special.
You can also top-dress around each plant with some peat moss and compost to improve the soil.
Time spent pruning your mums now will give you more flowers in the fall.

Tuesday, June 16, 2015

Taking care of Iris after they bloom


The iris blooms have been exceptional this spring. The Tall Bearded Iris and the Siberian Iris have done very well and now is the time to clean them up, feed them and get them healthy for summer and next year’s blooming season.
Start by snipping off any faded blooms that might be left. The best time to remove spent flower blossoms is right after they bloom, but this isn’t always possible, so do it now.
Cut the flower stem down to its base. The idea is to put all of the energy of the plant into building strong, healthy bulbs (called rhizomes) for next year’s blooms.
Fungal Leaf Spot was a problem this spring because of all the rain we had. If it’s really bad, cut the leaf off.

This is a good time to clean up any leaves, weeds or other debris that may have collected on the ground around the plant.
Treat the remaining leaves with Dusting Sulfur or wettable sulfur. Unless you need to move your Iris, wait until later in the season to divide them. You can dig and divide Iris from late August through September.
Do fertilize now with a low Nitrogen fertilizer such as Dutch Bulb food (7-8-5) or Steamed Bone Meal (3-15-0). Scatter some fertilizer around each rhizome and water in thoroughly.
If you prefer to use a liquid fertilizer, Age Old Bloom formula (5-10-5) can be applied to the soil using a watering can or sprayed on the leaves. Follow label directions for the right mix. The liquid fertilizers are easy to use and very effective.
Follow this up with a side dressing of Peat Moss and compost. Tall Bearded Iris is very adaptable and will do okay in most soils. They will thrive if you take the time to continuously improve the soil. All plants do better when you improve the soil they are growing in. It’s important to add organic material such as peat moss, compost, coconut coir to your perennial beds, at least once a year.
Another tip to keep them looking good all summer is to give them a dose of Epsom Salt (Magnesium Sulfate). Mix according to directions and water or spray your Iris. This will improve leaf color and plant vigor. Doing these things now will prepare your iris for next year’s bloom season.


Tuesday, June 9, 2015

Taking care of your Legendary Hanging Basket


Flowering Million Bells are petunia look-alikes and they are a perfect choice in your Legendary Hanging Basket. Million Bells (Calibrachoa) come in a wide variety of colors and will bloom continuously all summer.

 
Million Bells flowers have a dense trailing habit, so your plants won’t develop that spindly look in mid-summer. They bloom non-stop, with no dead-heading required.
They are resistant to tobacco bud worm and with proper care can produce stunning color all season long. Million Bells do best in full sun. They will do okay in dappled shade or afternoon shade but they perform best in full sun.  
Million Bells do require water and fertilizer to keep their color going strong. Check the water twice daily, once in the early morning and again in the early evening. A simple check to see if your basket needs watering is to lift it from underneath. If the basket feels light, it needs to be watered. If it feels heavy, it doesn’t need water.
Feed your Million Bells flowers every 10-14 days with Fertilome 20-20-20 hanging basket fertilizer.
Each Legendary Hanging Basket comes with a care label. In addition,  The Flower Bin staff will be glad to answer any questions you might have about taking care of your Legendary Hanging Basket, as well as other plants in your garden.


Tuesday, June 2, 2015

Planting for pollinators: Weigela


The Weigela has been a garden favorite for a long time. The flower display is best in early summer, but weigela will bloom sporadically through the summer and into fall.
The shape and color of the blooms will attract hummingbirds, butterflies, bees and other pollinators such as this Hawk Moth. Hawk moths are often mistaken for hummingbirds as they dart from plant to plant and hover to feed from tubular flowers. Weigela prefers to be planted in full sun. It will still flower when planted in light shade, but not as prolifically.
Once you’ve got your plant home and selected the site for your weigela, dig a hole twice as wide and slightly deeper than the shrub's root ball.
Amend the soil by incorporating compost or peat moss at about 50:50 with your native soil. Add some bone meal and plant your weigela so the top of the root ball is level with the ground around it. Fill in soil around the sides. Because weigela bloom on wood that’s a year old, the best time to prune weigela is right after they finish blooming. That is to say the wood that grows this year will bloom next year and you want to prune your shrub before the blooming wood has a chance to grow.
My Monet® 'Sunset'

'Red Prince' weigela will grow to 5' to 6' and 4' to 5' wide.

'Minuet' is a more compact Weigela which will grow to about 30" in height and about 2' to 3' across.  

'Wine and Roses'