www.theflowerbin.net
www.theflowerbin.net
Every garden needs
pollinators and you’ll attract more pollinators to your garden if you keep
these things in mind. Bees, butterflies, hummingbirds and other pollinators are looking for three
things when they visit your garden: food, water and shelter. Food for
pollinators means nectar and pollen. The ideal plants for pollinators will produce
flowers with high nectar and pollen content. Flower shape and color are
important factors to pollinators. Hummingbirds like brightly colored,
tube-shaped flowers. Among hummingbird favorites are Bee Balm, Cardinal Flower,
Catmint and Butterfly bushes. Hummingbirds will hang around your garden longer
if there are trees and shrubs nearby for them to hide in. Butterflies can’t hover like bees and
hummingbirds.

They need flowers they can land on in order to feed. Butterfly
Bush, Phlox, Hyssop, Asters, Mums and Coneflowers are some butterfly favorites.
The ideal plants for bees will produce flowers with high nectar and pollen
content.
Nectar feeds the adult bee and pollen is harvested to feed their
young. Beyond perennials and shrubs, think about incorporating annuals and herbs
into your pollinator garden. Zinnias are bee and butterfly magnets. Plant a
nice bed of zinnias and the bees and butterflies will come. Chives are another
plant which bees love. Include herbs such as borage, comfrey, mint and lavender
in your pollinator garden. Cover crops such as Crimson Clover attract bees and
can be worked into your garden to improve the soil once it stops flowering. Gardening
with pollinators in mind will include a place for them to find water. Birdbaths are a great source of water for bees and other pollinators. Place some
flat stones in the birdbath so bees will have a place to land and drink safely.
With some thought and planning, you can make your garden a destination for bees,
hummingbirds and butterflies.
What's
better than sitting in the garden with good friends and neighbors, enjoying a
cup of coffee?

The question often comes up about the benefits of using coffee
grounds in the garden. The simple answer is coffee grounds are a great addition
to your garden and to the compost pile. Coffee grounds can help improve your
garden soil by adding micro-nutrients, improving soil structure and by
encouraging earthworm and microbial activity. The common thought is that coffee
grounds will help acidify your soil. Coffee grounds tend to be pH neutral,
around 7 on the pH scale. The acid in coffee is water-soluble, so the acid is
mainly in your coffee cup, not in the coffee grounds. It's still worth while to add coffee grounds
to your soil because doing so will help
move your soil towards neutral pH, which is good for most plants. Coffee
grounds can also improve soil structure and drainage.
A good rule of thumb is 5
pounds of coffee grounds per 100 square feet of garden. Scatter the coffee
grounds around each plant and carefully dig them in. As coffee grounds
decompose, they release some nitrogen, calcium and magnesium, important
nutrients that support plant growth.
Coffee grounds don't do well as a mulch.
They tend to develop a hard crust and will repel water, if left on the surface.
It's better to dig them into the ground.
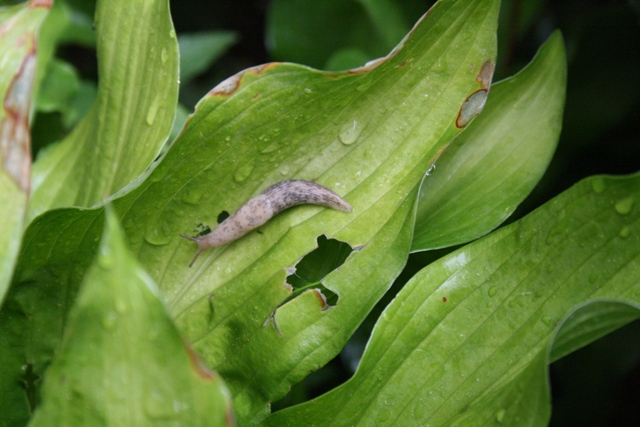
Many gardeners swear by coffee grounds
to help deter slugs. Apparently, slugs do not like to come in contact with
coffee grounds. Try it yourself, by scattering coffee grounds around hostas and
other plants in the garden. Remember to water thoroughly, because of the coffee
ground's tendency to crust over. There is also conflicting information as to
whether to add coffee grounds to your worm bins. This author has been adding
coffee grounds to my composting worm bins for a number of years with great
results. In the compost bin, coffee grounds count as a "green" or
nitrogen source. They help create heat inside the compost bin. Why not turn
your used coffee grounds into something useful in your garden.
Placing a
container next to the coffee pot will serve to remind you to save the coffee
grounds instead of throwing them away. When the container gets full, take it
out to the garden. Adding coffee grounds to your garden is just another step in
improving your garden soil and making your crops and flowers healthier.
The
hop is a hardy, perennial plant that you can easily grow at home. Hops (Humulus
lupinus) are used primarily as bittering and aroma agents in
beer, though their fast growth and height make them good candidates for privacy
and shade, as well. The keys to growing hops at home include a sunny location,
well prepared soil and space for the hop vines to climb. The ideal location in
your garden would be full sun. Hops will grow in partial shade, but the quality
of the plant will be reduced.

Good soil is a must in order to grow the best
hops. Plan to incorporate 5" to 6" of compost, peat moss and aged
manure into your native soil.
Dig it in to a depth of 8" to
10". This will enrich your soil, allow it to drain better and
help bring the pH down. Hops are planted from rhizomes, basically a piece
of root harvested from a mature plant. Rhizomes are available as "bare
root" stock or potted in one gallon containers.
Buying plants in
containers gives you a head start in establishing your hop plants this
season. The rhizomes should be planted about 2"deep and about 3'
apart.
Once you have the planting hole ready, add some steamed bone meal to
help the root system establish.
Hop plants can grow a foot a day and up to 15'
or more. Some type of trellis or support is essential.
If possible, plant hops
along a fence, the side of the garage or beside an arbor.
Or
build a trellis with poles and garden twine. There are dozens of hops that will
do well in your garden, including 'Bianca', 'Nugget' and 'Galena'. You’ll
find these and more hop plant varieties in our perennial house.
This
is the time of year when your geraniums and petunias can suddenly stop blooming.
When you look closely, you’ll see what looks like black pepper on the leaves
and you’ll see tiny holes in the geranium flower buds.

The problem is a tiny
worm, called a budworm. You can help control budworm with biological
insecticides containing BTi, such as Dipel and Thuricide.
These products will
control all kinds of worms and caterpillars, including tomato horn worm. It
takes care of the worm problem and won’t hurt your crops. If you choose, you
can hand pick tomato horn worm. When you see the leaves start to disappear off
your tomato plants, start looking for a large green worm. Once you spot them, it’s
easy to pick them off by hand.
Early June is a good time to repair bad spots in
your lawn. Rake up the area you want to reseed or sod. Spread some compost or
peat moss over the area you’re patching. Apply your grass seed evenly, then
cover the seed about 1/4" deep with compost or peat moss. Water thoroughly
and keep the area moist until the seed germinates.
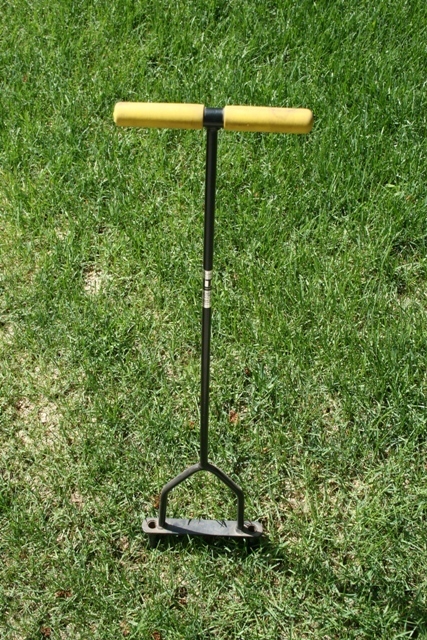
This is a handy tool to
have. You can use it to hand aerate chronic trouble spots in your lawn. Aeration
helps break up the soil and gets air down to the roots.
Applying Revive™ now
will help your lawn use water more efficiently and stay greener during the
upcoming summer months.
If you have dandelions and other weeds in your lawn, now’s
the time to apply Fertilome’s Weed-Out Plus. This will feed your lawn and get rid of broadleaf
weeds, including dandelions.
This is the time to start fertilizing your flowering
annuals with Fertilome water soluble 20-20-20. You should feed container
plants, including hanging baskets every 7-10 days. Annuals planted in the
ground can go a little longer between feedings. Plan to feed these plants every
14 days. Some other things to watch out for this time of year. You might see
grass starting to grow amongst your iris and phlox. You can use Grass B Gon ready-to-use to get rid of the grass without harming
your perennials.
Start checking your roses and other ornamental plants for powdery mildew starts to show up.
Powdery mildew looks like white, talcum powder on your
roses, lilacs, phlox, etc. Powdery mildew can also affect vegetables.
Prune your plants to improve air circulation; avoid
watering overhead especially late in the day and spray the affected plants with
sulfur. For help with your unique lawn or garden question, stop by our
Diagnostic Center. We’ll find the right solution for you.

 The ideal plants for bees will produce flowers with high nectar and pollen
content.
The ideal plants for bees will produce flowers with high nectar and pollen
content.
 Nectar feeds the adult bee and pollen is harvested to feed their
young. Beyond perennials and shrubs, think about incorporating annuals and herbs
into your pollinator garden. Zinnias are bee and butterfly magnets. Plant a
nice bed of zinnias and the bees and butterflies will come. Chives are another
plant which bees love. Include herbs such as borage, comfrey, mint and lavender
in your pollinator garden. Cover crops such as Crimson Clover attract bees and
can be worked into your garden to improve the soil once it stops flowering. Gardening
with pollinators in mind will include a place for them to find water. Birdbaths are a great source of water for bees and other pollinators. Place some
flat stones in the birdbath so bees will have a place to land and drink safely.
With some thought and planning, you can make your garden a destination for bees,
hummingbirds and butterflies.
Nectar feeds the adult bee and pollen is harvested to feed their
young. Beyond perennials and shrubs, think about incorporating annuals and herbs
into your pollinator garden. Zinnias are bee and butterfly magnets. Plant a
nice bed of zinnias and the bees and butterflies will come. Chives are another
plant which bees love. Include herbs such as borage, comfrey, mint and lavender
in your pollinator garden. Cover crops such as Crimson Clover attract bees and
can be worked into your garden to improve the soil once it stops flowering. Gardening
with pollinators in mind will include a place for them to find water. Birdbaths are a great source of water for bees and other pollinators. Place some
flat stones in the birdbath so bees will have a place to land and drink safely.
With some thought and planning, you can make your garden a destination for bees,
hummingbirds and butterflies.