www.theflowerbin.net

www.theflowerbin.net

Tuesday, October 29, 2013

Choosing the right pruners.


Choosing the right pruners. Your hand size and grip strength and the type of pruning you’ll be doing are important factors in choosing a pruner. Pruners can be broken down into two basic categories: anvil and bypass.
 
Anvil pruners have a fixed flat blade (anvil) and one moving blade that pins the branch in place and then cuts it. It’s much like using a knife on a chopping board. Anvil pruners tend to crush the branch rather that cut it. Anvil pruners are very useful in cutting dead branches.


Bypass pruners cut like a pair of scissors. One sharp blade cuts the branch as it moves by a thicker, unsharpened blade. Using a bypass pruner will result in a cleaner cut and less damage to the branch you’re working on. Hand pruners will cut stems and branches up to 1". For branches that are 1"-2", choose a lopper.
 
Unlock the pruner and hold it in your hand. It should fit comfortably. Try it out. Ask to cut something with it. The bottom line is pick a pruner that feels comfortable in your hand, that you can use for a long time and one that makes easy cuts.

You’ll be pleased with the results of having spent the time to find just the right pruner for you.
Felco has been making their classic model #2 for decades, but the #6 may be a better fit if you have small hands. Check the chart.
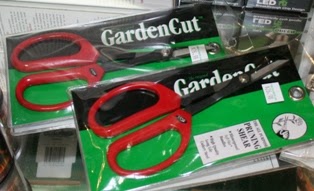
 For light trimming and deadheading, consider a pair of Garden Cut Pruning Shears. These shears stay sharp over many cuttings. Bonsai shears offer another choice for trimming and shaping. This one is nice because it has a finger loop to increase accuracy and reduce fatigue. Pruning, trimming and deadheading roses and shrubs is a key part of gardening. Having the right tools makers pruning much easier. Disinfect pruners with a Lysol or Clorox disinfectant wipe or dip your pruners in disinfectant solution to reduce risk of spreading disease among roses or bushes. Once you are doing pruning and disinfecting, spray blades with a silicone lubricant, to keep your pruners in top working shape.


Tuesday, October 22, 2013

Choosing small bulbs with big colors.


Spring flowering bulbs are a great way to add color and variety to your garden. In addition to tulips, daffodils and hyacinths, small bulbs (called minor bulbs) will add bursts of color from late winter through early spring. Minor bulbs are among the very first to bloom and they are available in a wide array of colors and styles. Here are a few of the choices for early minor bulbs.


Galanthus, known as Garden Snowdrop. Galanthus are very early to arrive, often blooming before crocus. Galanthus will do well in sun or partial shade. 

Scillia Siberica will appear soon after Galanthus, with dark blue flowers. Scillia can be planted under trees, because they bloom early, before the tree leafs out.

Puschkinia are very hardy bulbs, flowers are star shaped and striped in blue and white. Also known as striped squill, puschkinia are early blooming and fragrant.


Muscari, known as grape hyacinths, are hardy spring bloomers that produce blue or purple flowers that look like bunches of grapes, hence the common name. They will do well in sun or semi-shade and spread naturally.


Crocus are easy to grow and offer a wide variety of colors. They prefer sun and well drained soils.

Selection and planting tips. Pick the highest quality bulbs. We get our bulbs directly from Holland, from people we’ve done business with for decades. These bulbs produce larger blooms the first year and they naturalize (multiply and spread) in your garden, more readily. Pick a spot with plenty of sun and amend the soil with Sheep, peat and compost, or peat moss, then add either Bone meal or Dutch bulb food and plant about 2" deep. Scatter 10-15 bulbs per square foot, for a greater color impact. Water every 4-5 weeks during the winter. Leave foliage in place after bloom, to help the bulbs spread and bloom the following spring.

Tuesday, October 15, 2013

Fall Composting Tips


Fall is the best time to start composting, because you have a lot of composting ingredients to choose from this time of year. Cleaning up the flower beds and garden plots, mowing the lawn, raking fresh fallen leaves, vegetable scraps, annual and perennial flower cuttings. What makes good compost? Grass clippings that haven’t been treated with “weed and feed” or herbicides, cuttings from perennials that are soft, not “woody”, small twigs and vegetables that have run their course.
There’s always the question whether to use tomato plants in compost. Some things to consider before adding tomato plants to the compost pile. Diseases can survive the composting process and get added right back into the soil when the compost is used in the spring. The same can be said of any plants with powdery mildew or other molds. These need to be trashed, not used in the compost pile. In addition, the compost pile may not get hot enough (130° - 150°) to kill off the seeds of many plants, including weeds. There will be lots of volunteers everywhere you spread your compost, so remove seed heads and seed pods from plants before they are added to the compost pile.  
Basic composting consists of layering “green” and “brown” materials, and then adding water. Green materials are high in nitrogen such as grass clippings, fruit and vegetable scraps, coffee grounds, kitchen scraps, shrub clippings. These make the compost heat up. Brown materials are high in carbon, such as leaves, sawdust, twigs, dry garden waste, and shredded newspaper and cardboard. A good ratio is 3 parts brown to 1 part green.
 
The smaller the pieces are, the hotter the compost gets and the quicker the materials breakdown. Don’t compost meat, dairy or pet waste.
 
 
A simple way to compost is to bury it right in the garden (called trench composting). Trench composting takes up little room and will attract worms.
Or buy some starter worms to add to the process. Red wigglers are best for composting. 

 Another convenient way to compost is with a compost bin. Tumbling composters make it easy to turn your compost, thus speeding up the process. The more turns, the faster the compost develops. Keep compost moist, not soggy. If the compost starts to stink, it’s probably too wet (not enough oxygen).


The compost you start now will make a great soil amendment for spring. It will help break up the clay and add texture and nutrients to your soil. Remember to mix compost into the garden a few weeks before you plant, to give it a chance to work into the soil.


Tuesday, October 8, 2013

Growing Fresh Herbs Indoors


How can I grow fresh indoors this winter?


Growing herbs indoors this winter, is easier than you think. And, you’ll be rewarded with fresh cooking herbs you grow and harvest yourself, as well as the color and aroma of herbs. Popular herbs which do well inside are parsley, basil, sage and thyme, but most herbs lend themselves very well to be grown in pots and containers indoors. Here are some tips to help grow healthy herbs indoors successfully.
 
You can grow indoor herbs anywhere they will get enough light, such as a window ledge in the kitchen. Choose a location with at least 6 hours of sunlight, such as a south or west facing window.
 
Or supplement your natural light with additional lighting from a fluorescent fixture or incandescent bulb. Kits such as Jump Start® are easy to set-up, come with a full-spectrum bulb and the bulb height can be adjusted quickly, as plants grow. Incandescent bulbs are convenient, because they can be used in ordinary lamp fixtures. Plan to keep the light on 9-10 hours per day.

There are many attractive clay or ceramic container options to plant herbs in. Be sure the container has good drainage.
Choose a quality potting soil to plant your herbs in. Regular watering is important. Avoid over watering or under watering. Consistency is best for the plant.
Herbs grown indoors need to be fertilized. Choose a fertilizer such as Age Old Grow® or Fish & Seaweed®. Feed herbs every other week, following label instructions. Herbs will do best if they are continuously harvested.


Apart from cooking, herbs make great house plants. Herbs such as Pineapple Sage and Lavender will flower, plus many have relaxing fragrance, even when they are not blooming. An indoor herb garden allows you to enjoy the flavor and fragrance of fresh herbs year round.

Tuesday, October 1, 2013

Care for tender bulbs in the fall.


How to dig and store cannas and other summer bulbs.


One of the tasks in preparation for fall is to dig and store tender bulbs. Cannas, gladioli, begonia, dahlia bulbs, rhizomes and corms will not survive the winter in the ground.


When the leaves start to turn brown or the foliage is killed off by first frost, it’s time to dig and store tender bulbs. Raise your bulbs with a spading fork, digging carefully to avoid damage. Most bulbs will have grown over the summer. Cut the remaining foliage back to about 2"-3".  Rinse them off and let dry in a shady spot. After bulbs dry, dust with sulfur.
Sulfur will help ward off diseases and insects. Bulbs can be stored in cardboard boxes or paper bag containers layered with peat moss, vermiculite or coir.
Select a storage spot that is cool, between 45º and 50º. Some bulbs will store at temperatures up to 60°, but cooler is better.


The packing material will help stabilize the temperature.  Remember to label bulbs and tubers going into storage.
 
 
Write directly on the bulb with a felt maker or use plant labels. Bulbs and tubers need attention during storage, so check on them every week or so. Make sure they don’t dry out and keep an eye out for damage or disease that may show up in storage. Mist the packing material to keep moisture levels up and to prevent bulbs from drying out.  If bulbs start to shrivel or wrinkle, soak them in water for a few minutes and re-moisten the packing material. In spring, divide rhizomes. Remove any dead areas and make sure each division has at least one growing point or “eye”.