www.theflowerbin.net

www.theflowerbin.net

Tuesday, February 23, 2021

All About Air Plants


Tillandsia, commonly known as air plants are among the most interesting plants you can grow in your indoor garden. These unique plants don’t require soil in order to grow so they can be displayed in many creative ways. Air plants are epiphytic, meaning they grow naturally on trees, rocks and often, other plants. They absorb water and any nutrients they need through specialized hairs (called trichomes) on their leaves. Once you understand their basic care, they are actually very easy to grow. Just like plants that grow in soil, air plants need light and water in order to flourish. When you get your air plants home, place them where they will receive bright, indirect light. Avoid direct sun as air plants will sunburn. Given the proper light, some varieties of air plants will change color and “blush” red, or pink and then bloom. If possible, keep your plants away from drafts, heating and air conditioning vents. These conditions will cause your air plants to dry out faster. Because air plants take up moisture through the leaves, it’s important to keep them hydrated. 
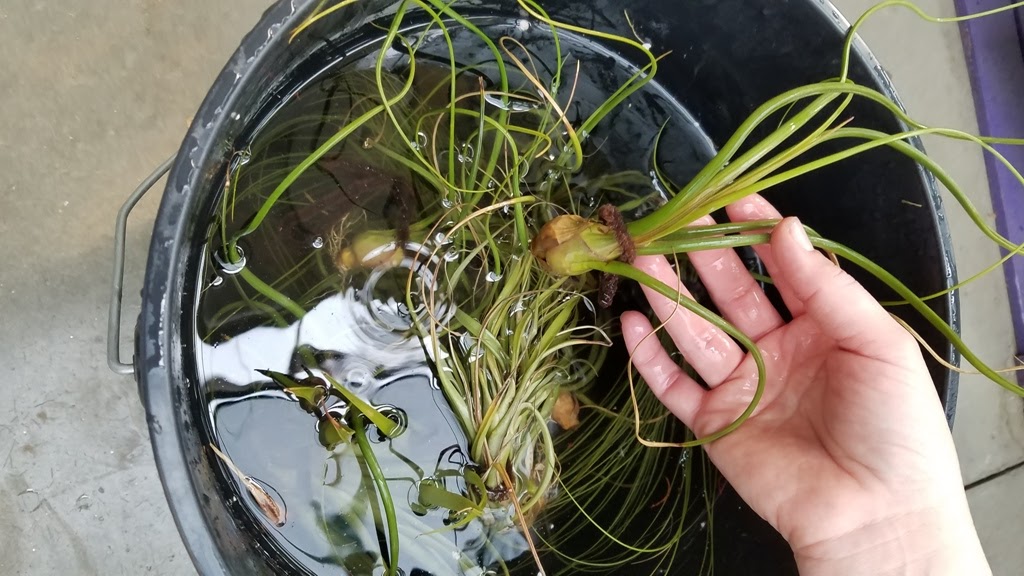


While misting helps raise the humidity, it’s not enough to give air plants the water they need. Plan to soak each air plant for fifteen to twenty minutes once or twice a week; once a week if your plants are growing in a cool, humid spot; twice a week if they’re located in dry, warm spot. It’s also possible to soak your air plants for up to twelve hours every ten to twelve days. Whichever method you choose, use bottled water or tap water that has been left out overnight so that the chlorine evaporates. Do not use distilled water. 


Add a pinch of Epiphyte's Delight fertilizer to the water every other soaking to provide nutrients. When it comes to displaying your air plants, the possibilities are endless. Tillandsias can grow anywhere – on rocks, seashells, in ceramic pots, on ceramic figurines, attached to wood, cork or a stone, in glass holders, even attached to a magnet on your refrigerator. Tilly Tacker is a clear, waterproof air plant glue that will allow you to attach your air plants to virtually any surface you want. With a little care, your Tillandsia plants will thrive in your home for many years to come.   


Tuesday, February 16, 2021

How to Start Seeds Indoors

Starting plants from seed is a great way to get exactly the variety of vegetables and tomatoes you want. In addition, warm weather crops such as tomatoes and peppers require long growing seasons and you’ll generally get the best yields by starting them early indoors. Kale, radishes, lettuce and many other vegetables can be started indoors and then transplanted or you can wait a few more weeks and seed them directly. In fact, many cool weather crops can be planted in the ground in early March.   Begin by selecting the variety of warm weather crops you want to start indoors. For best results, choose seeds from a local supplier. 


Take time to read the seed packet. You’ll find valuable information regarding planting depth, spacing and days to emerge on the outside of the packet. For even more detailed product information, read the inside of the seed packet. Make sure the packet is labeled for 2021 season. Next, you'll need seed starting trays and inserts. There are a number of inserts you can use. The only difference is the cell count. You can also choose peat pots in a variety of sizes to start your seeds in. 


Seedlings started in peat pots can be planted directly in the garden, which reduces transplant shock.  Add a 2" or 7" dome to help keep in the moisture, while your seeds sprout. Once you have your starter containers, pick up some seed starting mix. Use seed starter, not potting soil. You'll have much better results. It's a good idea to moisten the seed starting medium before you sow your seed. Check the back of the seed packet for sowing instructions. The seed package will tell you how deep and how far apart to plant the seeds. 


Heat mats help seeds germinate faster and root deeper, by keeping the soil temperature constant. Even as the room cools off at night, the soil stays warm and seeds will sprout faster. Once your seeds are up and have grown two or more sets of leaves, it may be time to add some supplemental lighting. Common grow lights include T5, LED, CFL and Incandescent. Providing adequate lighting is one of the most important aspects of growing strong, healthy seeds indoors. If you’ve had problems with seedlings growing long and spindly, it’s a sign they need more light.  Feed your seedlings with a mild liquid fertilizer once they've developed three or more sets of true leaves. As your plants grow, use a small fan to circulate the air over your plants. This helps them develop strong, sturdy stems.  As to when to start your seeds, a good rule of thumb is six to ten weeks before the last average frost date, which is May 15. If you’re not sure how to get started growing seeds indoors, stop in. We’ll be glad to help you choose the seeds and supplies and lights you’ll need to grow your own tomatoes, peppers and vegetables.