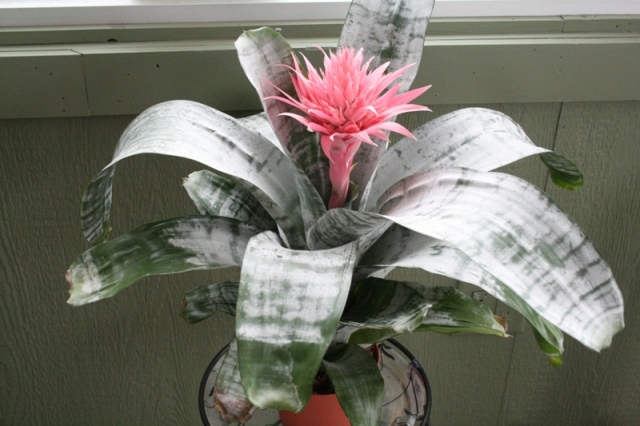
Bromeliads are valued for their exotic foliage and outstanding blooms. Bromeliads are superb potted plants, easy to care for and will bloom for long periods of time, if you provide them with the proper care.
Begin by selecting a spot where your bromeliad will receive the right light. Bromeliads thrive in areas where they will get lots of bright, filtered light or indirect light, but won't be exposed to direct sun. Another important consideration is room temperature. Bromeliads do best when the room temperature is between 55° and 85°.
Bromeliads are tropical plants and as such, love humidity. An easy way to increase the humidity around each plant is to make a pebble tray. Simply add small rocks to a saucer, then fill with water. Place your bromeliad on the rocks, making sure the bottom of the pot is above the water in the saucer.
Speaking of water, watering your bromeliad is a little different that watering your other houseplants.
Bromeliad leaves generally grow out of a central cup or vase. When you water, you'll want to water directly into this cup or central vase.
Add enough water to fill the vase to overflowing. The excess will trickle down and moisten the compost below. Refresh the vase water every 2 weeks or so by emptying the vase and adding new water. It's best to use water that is at room temperature. You can do this by letting a container of water sit out overnight. This will bring it to room temperature and also help dissipate some of the chlorine in our water.
As bromeliads age, they often produce new shoots at their base. These baby bromeliads are called pups and as they mature, you can harvest them and start new bromeliad plants.
With their intense color and interesting foliage, bromeliads offer a "touch of the tropics" to your home. Definitely a houseplant worth adding to your collection. www.theflowerbin.net
www.theflowerbin.net
Thursday, January 25, 2018
Thursday, January 18, 2018
Worm Composting Basics
Interested in turning your food scraps into compost? An easy way to do this is to start composting with worms. Worm composting is also called vermicomposting and offers many advantages. Done right, vermicomposting is clean, doesn't smell, doesn't take up a lot of space and doesn't cost a lot of money to get started.
Begin by selecting a container, such as this 5-gallon storage tote.
Worms don't like light, so the bin must be opaque and have a lid. Prepare the container by drilling a series of holes on the sides, bottom and the lid. This will allow the bin to "breathe" and drain properly.
Next, add 3" to 4" of bedding. You can use shredded newspaper, cardboard or coconut coir. The bedding needs to be soft. No sharp edges. Once you have the bedding ready, add water, then wring it out. It should be as wet as a damp sponge.
You're ready to add your worms. Buy red wiggler worms (Eisenia Foetida). They're the best for in home composting. Red wigglers can eat about half of their weight in food every day. This means if you start with a pound (16 ounces) of worms, you'll be able to feed them one half of a pound (8 ounces) of food scraps every day. A pound of worms is a lot of worms. You can start with a smaller amount and as your worms settle in, they will begin to reproduce and build up the population.
Red wiggler worm eggs (called cocoon) are smaller than a grain of rice and can be difficult to spot in your bin. It takes about 23 days for a cocoon to hatch.
The newly hatched worms resemble white threads, but even at this stage, they're ready to go to work. You're ready to feed your worms. Start by burying some food scraps in the bedding.
Red wiggler worms will eat a variety of food, including fruit and vegetable peels, coffee grounds, egg shells and tea bags. They love melon rinds! Don't feed your worms meat, kitchen oils or dairy products. Place your worm bin in a warm spot out of direct sunlight. Put the container inside of a tray or pan to catch any liquids that might drain out.
Check on your worm bin regularly. If you catch the worms trying to escape, it means the bedding is to wet. Cut down on the food and crack the lid to let more air in.
In a short time, your worms will have transformed leftover table scraps into rich compost, which you can use to feed your houseplants or improve your garden soil.
Subscribe to:
Posts (Atom)