www.theflowerbin.net

www.theflowerbin.net

Tuesday, June 29, 2021

How to Plant and Care for Daylilies


Daylilies are among the most popular perennials and for good reason. Daylilies are easy to grow and don't require much in the way of maintenance. Daylilies are very adaptable to a wide variety of soils and conditions. It's one of the features that make them popular landscape plants. You'll find them planted along streets and sidewalks, often under rock mulch, blooming away. 


That being said, you'll get the best from your daylilies if you take the time to prepare the planting site soil properly. Daylilies do best in full sun. They'll tolerate light shade but flower best when they receive at least 6 hours of sunlight a day. Daylilies belong to the genus Hemerocallis, a Greek word made up of two parts: Hemera meaning day and Kallos meaning beauty. An appropriate name, since each flower lasts only one day. Given that established daylilies produce an abundance of flowers that open over a long period of time, your plant will produce blooms on a daily basis through much of the season, especially if you keep up with the maintenance through the season. Removing spent blooms soon after flowering will keep your plants looking well-groomed and encourages re-blooming. 


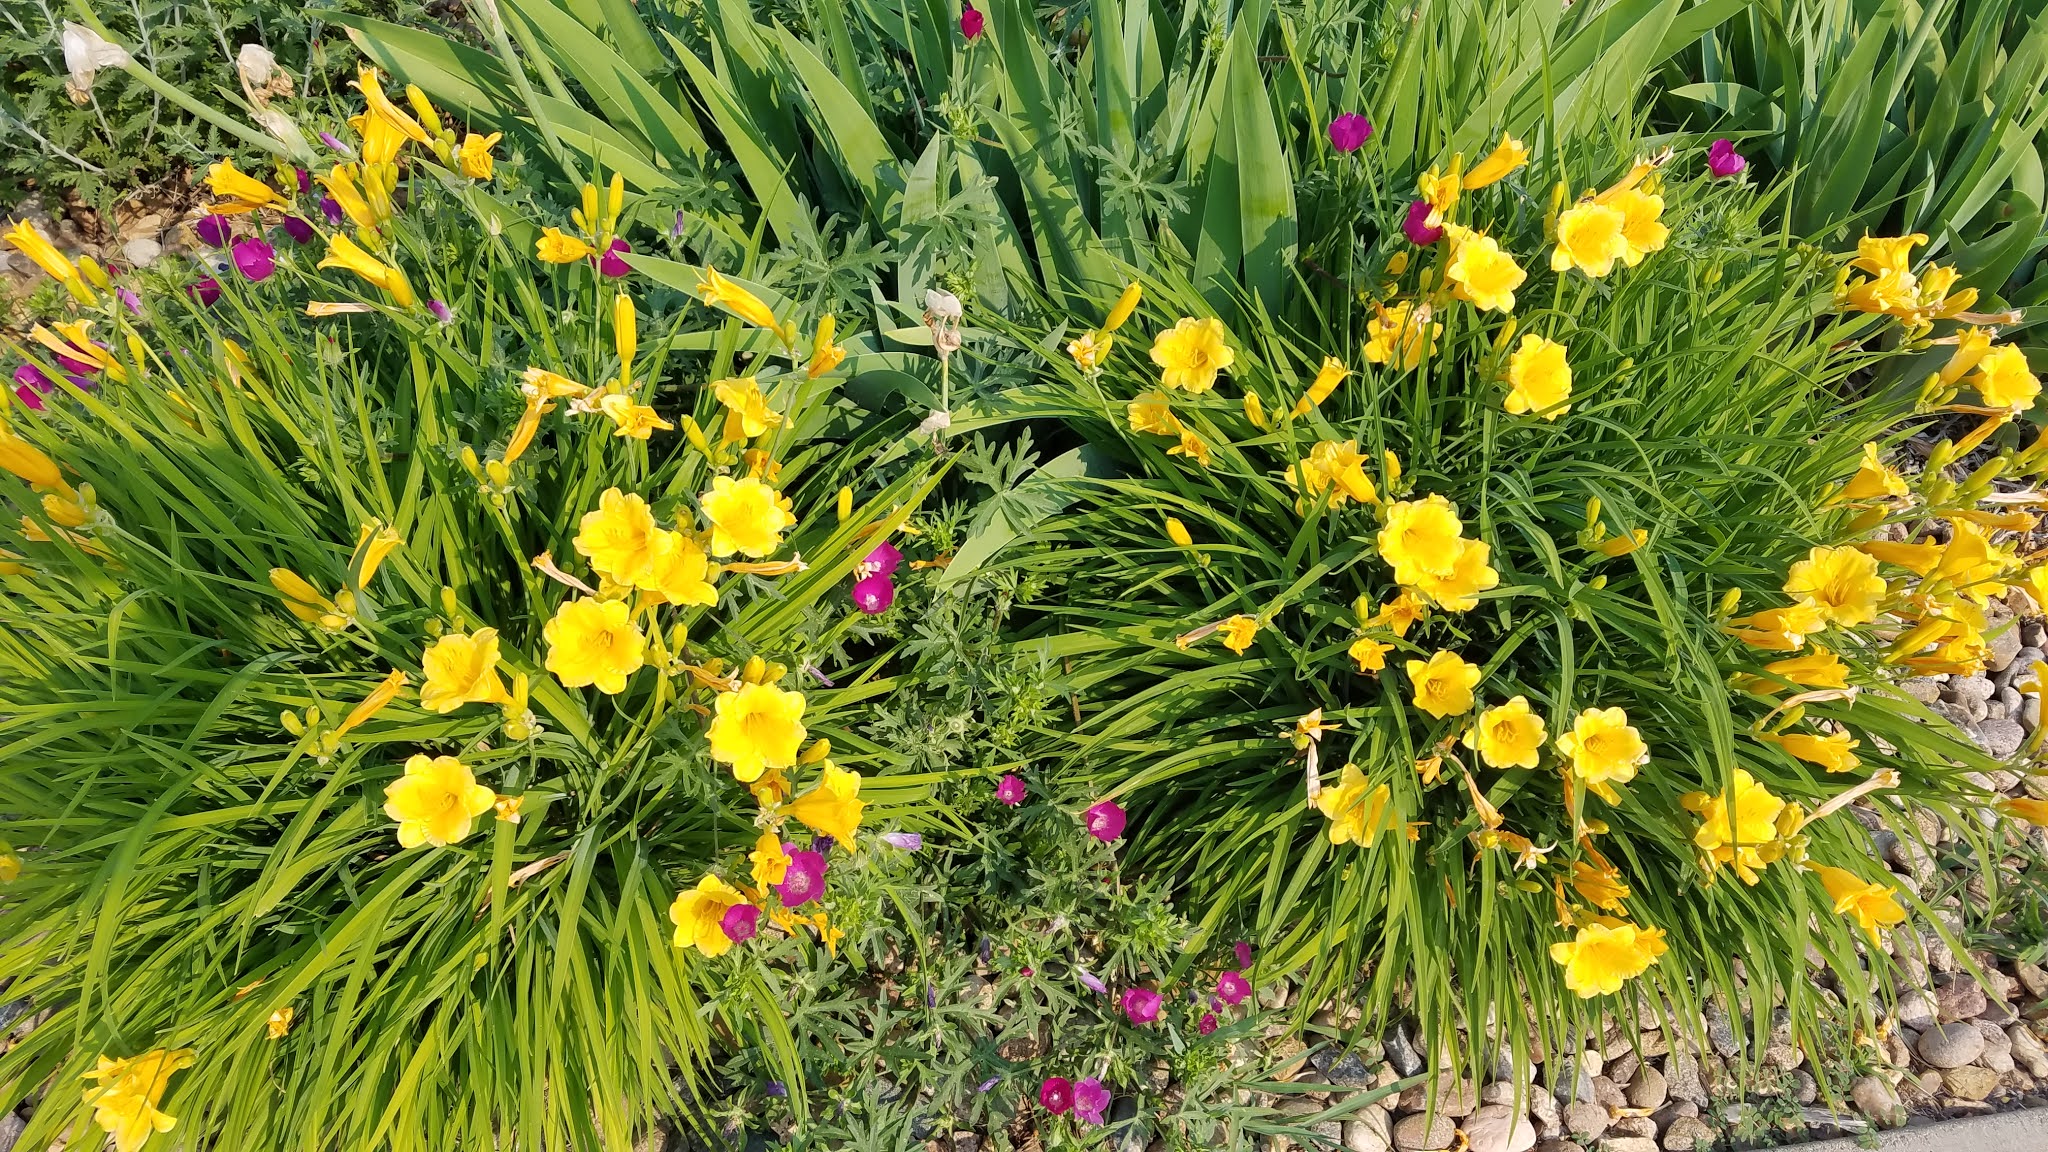
We have well-rooted daylilies in our Perennial section, ready to take home and plant. Daylilies perform best when planted in an area where they’ll receive at least six hours of sunlight. Once the site has been selected, it’s important to amend the soil with organic material. Earth Essentials Sheep, Peat and Compost is a good choice. Mix the Sheep, Peat and Compost with the native soil at a 50:50 ratio. Make the planting hole twice as wide and one and a half times as deep as the one-gallon container your daylily came in. Remove the daylily from its pot and place in the planting hole so the crown of the plant is even with the surrounding ground. Next, add enough soil to cover the root system.  Now, mix three and one-half tablespoons of Root Stimulator to one gallon of water and pour into the planting hole. Finish up by filling the rest of the planting hole with amended soil. Through the season, feed your daylilies with a general fertilizer such as 11-15-11. Easy to grow, low maintenance daylilies are hardy perennials that thrive in our climate. They establish quickly, grow vigorously under a variety of conditions and will provide color to your summer garden for many years to come.  


Tuesday, June 22, 2021

How to Grow Amazing Annuals


When you're looking for a welcome splash of summer color for your garden or patio, there's nothing quicker or better than annuals.  Even the smallest of courtyards or balconies can find room for a hanging basket, a window box or container filled with annuals.   Annuals are defined as plants which complete their life cycle in one season. Annuals will sprout, grow, bloom and die in a single season. Perennials on the other hand, are plants that come back year after year. 


Geraniums, petunias, marigolds, begonias, zinnias are sun-loving annuals that will produce uncommon colors through our gardening season. If you’re wanting to add color to a shady spot, consider begonias and impatiens, fuchsia and caladium.  


Once you’ve made your decisions and chosen the annuals you want for your landscape, it’s time to plant. Choose the right soil to plant your new annuals in. If you're planting in a container, use a quality potting soil. High grade potting soils are light and airy, do not contain clay or garden soil or water retention crystals. 


If you're planting in a garden bed, take time to amend your soil. Locally-produced Earth Essentials products are rich in trace minerals, organic material and beneficial microbes and will improve your garden soil's physical and biological health. As a result, your annuals will root out better and thrive through the growing season. When taking your plants out of their plastic containers, loosen up the roots so they’ll spread out. Plant them so the base of the plant is even with the soil. Next, water them well. Hanging basket and container gardens need to be checked daily to make sure they don't dry out. To keep their color going strong, annuals need to be fed on a regular basis. 20-20-20 ferti-lome is a balanced fertilizer designed to feed your annuals just what they need to keep them healthy and flowering throughout the season. Plan to fertilize every twelve to fourteen days. When you're looking for plants that will add color to your garden beds or containers, look no further than annuals. Annuals add instant color to your garden and patio and with a little care, these amazing plants will provide color and interest all season long. 


Tuesday, June 15, 2021

Planting for Pollinators


June is Pollinator Month in Colorado, a time to bring focus on the importance of supporting pollinators in our gardens and landscapes. Creating a pollinator friendly garden involves planting and maintaining a variety of perennials, annuals and flowering shrubs, as well as providing water, shelter and nesting sites. Perennials with good sources of nectar and pollen include Asters, Black-eyed Susan, Columbine, Coneflower, Digitalis, Gaillardia, Joe-pie Weed, Mums, Penstemon and Sedum. Pollinator-friendly shrubs in your garden should include Blue Mist Spirea, Lilac, Rose of Sharon, Weigela and Butterfly Bushes. Beyond perennials and shrubs, think about incorporating natives, annuals, bulbs and herbs into your pollinator garden. Native plants include Columbine, Native Bee Balm, Rocky Mountain Penstemon and Sunset Hyssop.  The key to attracting and supporting pollinators is to offer plants that provide pollen and nectar through the season. 


This can be accomplished by including annuals and herbs in your garden. Annuals such as Sunflowers, Zinnias, Marigolds, Lantana, Petunias, Salvia will help fill in any gaps in the seasonal bloom cycle. Herbs such as chives, basil, comfrey, mint and lavender support pollinators. Cover crops such as Crimson Clover attract pollinators and can be worked into your garden to improve the soil once it stops flowering. In the fall, plant spring blooming bulbs such as crocus, hyacinths and tulips to support early foraging pollinators. 


Planting in groups or clusters will bring a focus to your landscape and save pollinator’s energy searching for food. Gardening with pollinators in mind should include accessible water. 


This could be a shallow pot saucer or a birdbath.  Place some flat stones in the birdbath or saucer so pollinators will have a place to land and drink safely. Consider leaving a patch of the garden uncultivated for native bees that burrow. For wood and stem-nesting bees, hang a nesting block or place one on the fence or bench. Even a small pollinator garden will help support bees, butterflies and other pollinators. With some thought and planning, you can create a destination that pollinators will be attracted to.  

Tuesday, June 8, 2021

How to Care for Lilac Bushes


Keeping lilacs strong, healthy and blooming season after season, requires some maintenance. Proper care includes deadheading, pruning out old, diseased wood and in some severe cases, rejuvenation pruning. Deadheading involves removing the spent blossoms from this year's bloom.  This should be done as soon as possible after the flowers fade. Lilacs bloom on old wood. This means that soon after flowering, they begin to set the buds for next season's blooms. If you wait too long, you'll remove most of next years blooms.  


The old flower cluster should be cut off at its base, just above the two fresh shoots that emerge from the same branch as the faded flowers. While you’re at it, cut of any old seed pods. The new shoots will grow over the summer, set flower buds and be topped off with a flower cluster the following spring. This is also the time to get rid of dead, damaged or diseased stems, as well as any branches that cross one another. To keep your lilac bush from growing too tall, remove one-third of any old stems that are thicker than two inches. Examine the base of the lilac. You’ll typically find a number of new shoots growing around the base. Remove all but three or four of this new growth. These actions will help keep the best wood and prevent the bush from getting too leggy. Prune off any extra-long stems back to the closest set of side shoots. If indeed, your lilac has seen better days, rejuvenation pruning may be in order. This involves cutting every cane back to 4”- 6” above the ground. This drastic approach will result in many vigorous canes the following season. If your lilac bush is of the grafted variety, be sure and cut above the graft. 


These care instructions are for common lilacs (Syringa vulgaris). Dwarf lilacs such as ‘Miss Kim’ seldom need pruning, other than deadheading as the blooms fade.  Finally, work in 2” of Earth Essentials sheep, peat and compost to the soil around the bush; add a balanced fertilizer, such as 11-15-11 and mulch to about 3”. Your lilac will be prepared for the rest of the summer and ready to bloom next spring. 

Tuesday, June 1, 2021

The Keys to Growing Vegetables in Containers


The lack of a traditional garden doesn't mean you can’t grow your own tomatoes, herbs and fresh vegetables. Most crops can be grown successfully in containers on the patio, balcony or deck. The keys to productive container gardening are: deciding what you want to grow, choosing the best container for the crops you chose, selecting a high-quality potting soil mix and a fertilizer designed to get the most out of your crops. When you’re deciding what to grow, plan to plant crops you’re most likely to pick, prepare and eat.  If you don’t like tomatoes, don’t grow them. Light is also an important consideration when choosing plants. Tomatoes, peppers and potatoes six to eight hours of sunlight daily in order to produce. Beans, beets, leafy greens, radishes and most herbs will do fine in six hours or less of sunlight. Once you have growing plan, it’s time to choose a container.  Typical containers include clay, plastic and ceramic. Clay pots "breathe" better than plastic and they look natural. They are still a favorite of gardeners everywhere. Plastic pots are available in different colors and aren't as heavy as terracotta or ceramic. Ceramic pottery is available in many colors and offers a "finished" look. Choose a container that drains. No matter how careful you are, water will build up over time and cause damage to the roots of your plants.  Adding gravel or pot shards to the bottom of the container doesn't help drainage. Match the container size to the tomato or vegetables you want to grow. For tomato plants, peppers, cucumbers, choose a container that's 24" in diameter or larger. 


An 18" diameter container will hold a bush tomato, cauliflower, cabbage or mixed greens. In a 14" diameter container you could plant cabbage, collards, arugula or leaf lettuce. A 10" container will accommodate herbs, lettuce, leafy greens. Not all containers are round and tall. Many are rectangular or bowl-shaped. It's best to talk to us about what you want to grow and then we can show you your options in container size, shape and color. 


Self-watering containers such as an Earth Box™ make it easier to grow tomatoes and other vegetables. An advantage of the Earth Box™ is the optional trellis designed specifically to support tomatoes and climbing vegetables. Smart Pots are soft-sided fabric containers. The benefits of Smart Pots include aeration, water drainage and heat release. Now that you've selected your container, choose a quality potting soil to put in it. High grade potting soils are light and airy, do not contain clay or garden soil or water retention crystals.  We recommend The Flower Bin Potting Soil for growing tomatoes and vegetables in containers. 


Feeding your tomatoes and vegetables will help assure a good crop. Organic products like Fox Farm Tomato and Vegetable will provide nutrients for your plants need in order to produce the best harvest.  A watering wand will help you water your containers and a moisture meter will help you decide when to water. There's nothing like growing your own tomatoes, vegetables and herbs. Whether you're short on gardening space or just want to add to your existing garden area, we're here to help you create a great container garden.