www.theflowerbin.net

www.theflowerbin.net

Wednesday, July 25, 2018

Treating Blossom End Rot


Calcium is one of the essential elements needed to grow tomatoes. It’s responsible for fruit cell development and if the supply of Calcium is interrupted, the result shows up at the tips of the fruit, the end opposite of the stem. 


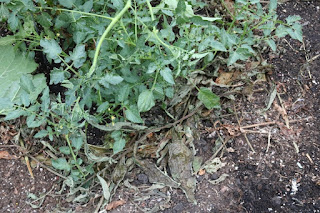
This is called the blossom end and the dark spots forming at the end of your tomato is called Blossom End Rot. While there is no cure for fruit with Blossom End Rot, there are ways to reduce its effects and increase yields of good tomatoes, plant by plant. The most common cause of Blossom End Rot can be traced to uneven watering. It’s important to maintain a consistent level of soil moisture throughout the growing season.


Get in the habit of watering slowly at the base of the tomato plant, long enough to get the soil soaked 6” deep. Stick your finger in the ground and see how wet it is. Or buy a moisture meter.

Another way to help maintain moisture levels is to mulch your plants with products such as Soil Pep. Produced in Colorado, Soil Pep helps retain moisture, reduces weeds and can be used as a soil amendment in the fall.  Reducing weeds with mulch is important because you won’t need to cultivate around your plants. Cultivating or pulling weeds can damage root systems, which in turn can interrupt water and nutrient flow.
Foliar applications can be used to correct Calcium deficiencies. These are available as Ready-To-Use sprays or you can purchase a concentrate and mix your own.  This should be done on a weekly basis, thoroughly covering the foliage and fruit.
Calcium can also be added to the soil during the growing season. This box of Down To Earth contains small, medium and large particles of oyster shells, which will provide a sustained release of Calcium. Pull back the mulch around your plant, apply an even layer of Oyster Shell, water in and put the mulch back in place. This way the root system won’t get disturbed. Using these methods, you should be able improve your tomato yields this season. Peppers, squash and cucumbers are susceptible to Blossom End Rot. Good watering habits and Calcium supplements will improve yields on these vegetables as well.  

Wednesday, July 18, 2018

Summer Rose Care

Roses provide beauty and grace to our gardens, as well as attract pollinators, but like any other plant in your landscape, roses get stressed by summer’s temperatures and dryness. You can help your roses stay healthy and blooming by keeping up with deadheading, watering properly, fertilizing and controlling disease and insects. Sounds like a lot, but if done on a regular basis, your roses will do well through out the summer season.
First of all, keep up with removing fading blooms. This is called deadheading and it’s important to do for two reasons. Pruning spent blooms keeps the rose bush neat and tidy. Removing fading flowers will prevent the rose plant from wasting energy producing hips and encourage more blooms.
Snip the old bloom just above an outward facing 5-leaf set. At this point in the season, you're like to find more 5-leaf sets than 3-leaf or 7-leaf sets.
Hard prune any dead or diseased canes to the ground. Seal the tops of the cane with Elmer’s glue to prevent further damage.  While you’re pruning, watch for indications of disease or insects.
Common rose diseases include black spot, rust or powdery mildew.
Insects to watch for this time of year include aphids, spider mites and thrip.
Diseases can be treated
by removing any obviously bad leaves or with fungicides such as Sulfur or Serenade.
Insects can be managed
with products such as Neem or Spinosad or a healthy dose of ladybugs. Fungicides and insecticides should be applied in the evening, when pollinators are absent and temperatures are cooler. Roses should be well hydrated prior spraying any pesticide. The best way to water roses is slowly and deeply, at the base of the plant. Watering overhead encourages disease problems.
Mid to late July is
the time to feed your roses. Choose a fertilizer such as Mile-Hi Rose Food or Fertilome Rose and Flower Food. These organic fertilizers promote healthy soil, strong canes and vigorous blooming. Keeping your roses pruned, fed and hydrated is the best defense against bugs and fungus.
Finally, know don’t guess. What looks like a disease may actually be an insect or a nutrient deficiency. Bring us a sample of the problem you’re having. We’ll diagnosis it and come up with recommendations to solve your rose and plant issues.   

Wednesday, July 11, 2018

Summer Lawn Care Tips


Given the type of grass and the soil conditions your grass is growing in, lawn health this time of year is most influenced by mowing and irrigation practices. The vast majority of our lawns consist of cool season grasses: blue grass, perennial rye and turf-type tall fescue or combinations of all three.  These grasses do best in summer when you mow the lawn higher and more frequently.
Start by setting your mower height range to between 3 inches and 4 inches. Mowing cool seasons grasses at this height reduces heat stress on the lawn, retains moisture and encourages deep root development.  Combine the increased height with more frequent mowing. Plan to mow often enough so that you’re not removing more than one-third of the total length.
When you do mow, make sure the mower blade is sharp. Dull blades tear the grass rather than cut it. The results are a ragged look to the lawn and turf grass that’s more susceptible to disease. 
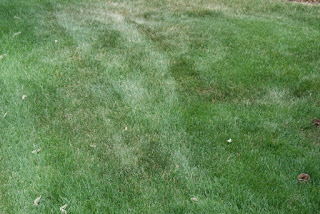
When it comes to watering your lawn, it’s best to water late evening or early in the morning, before 6 am. You want to run your water system for longer periods of time and do it less frequently. For cool weather grasses such as blue grass, fescue and rye, watering deeper and less often will stimulate long root growth. Long, strong root systems use less water to maintain a healthy turf. Ideally, the soil should be moist 4 to 6 inches below the surface, after you finish watering. If you’re watering every day for short periods of time, the water will not get deep enough.  Consider watering when your lawn needs it, rather than on a set schedule.

When t
he color of the lawn turns from green to light gray or when you walk on the lawn and the grass doesn’t spring right back up, your lawn needs water. In addition, continual applications of humate and Revive, along with top dressing your lawn with organic material will contribute to better water utilization, nutrient uptake and turf quality.  

Wednesday, July 4, 2018

Growing and Using Comfrey in Your Garden


There are a number of reasons you should be growing comfrey. Comfrey is hardy to Zone 4, does well in full sun or partial shade and once established, can easily grow to four feet or more, with large grey-green leaves and delicate purple flowers. 
As a plant, comfrey will add interest and beauty to your garden, but its usefulness extends beyond its aesthetic appeal. Both the flowers and the leaves can play an important role in improving the yield and quality of your vegetable garden.

Comfrey will generally bloom in late April or early May, offering important forage for bumblebees and other pollinators.
Flowering will continue through the greater part of the summer, encouraging pollinators to stop by your tomatoes, peppers, squash and other vegetables, improving blossom set and increasing yields.
The leaves of the comfrey plant can also be utilized to improve your vegetable garden. Comfrey leaves hold rich deposits of nitrogen and potassium and can be used in a number of ways to feed your plants as well as improve your garden soil. You can begin harvesting comfrey leaves when the plant is about two feet tall. Cut the leaves down to within a few inches of the crown.
The plant will rebound quickly, sending out another set of leaves in a matter of days. In fact, you should be able to harvest comfrey leaves three or more times during the course of the season. Once harvested, comfrey leaves can be utilized as a mulch, a green manure or you can make a tea or fermented plant juice out of them.
Mulching your tomatoes and vegetables with comfrey leaves is easy. Simply place several inches of leaves around the base of your plants. This will act as a mulch to hold moisture in and prevent weed from germinating.
As the leaves break down, they will slowly release nitrogen and potassium to your plant’s roots. Another way to harvest comfrey's nutrients is to brew some tea.
Simply cut up the leaves, place them in a clear jar, add water and a cap and set in the sun. They’ll brew just like sun tea.
In a few hours, you’ll see the liquid start to turn brown, indicating the brewing process is working.
After 32 to 48 hours, your brew should be ready to use. There are three advantages to doing your tea this way. It’s quick. You normally don’t have to dilute the solution to use it and it doesn’t smell. You can ferment comfrey leaves and achieve a stronger solution, but the process takes weeks and the end result has a strong, disgusting smell. Comfrey can also be used to energize your compost pile. Layering comfrey cuttings in with your compost is an effective way to jumpstart decomposition.
At the end of the season, lay your final comfrey leaf harvest on top of the garden and cover it with compost or earth worm castings. It’s a great way to improve the soil through the winter