www.theflowerbin.net

www.theflowerbin.net

Tuesday, June 30, 2020

Now’s the time to prepare your lawn for Summer


 Summer’s heat can stress your lawn in a number of ways. You may notice brown patches showing up. Your lawn may look weaker and lack the dark green color you’re used to seeing and no amount of water seems to improve the situation. Just like every other plant, tree and shrub in your landscape, your lawn will only do as well as the soil it’s growing in. If the soil wasn’t amended properly when your lawn was first planted, summer’s heat can bring on a myriad of problems, including brown patches, thin spots and turf die back. You know you have a problem when your grass looks bad no matter how much water you give it. Short of tearing your lawn out and starting over, there are steps you can take now to improve your soil and keep your lawn looking good through the summer season. Step one: core aerate. Core aeration will open up the soil, improve water and fertilizer utilization and reduce water runoff. 

Step two, add humate to your soil by applying organic HuMic.  Humate is basically super compost which improves soil structure, encourages root growth and helps your grass take up nutrients more efficiently. HuMic comes in granular form and is easy to apply, using your fertilizer spreader. 

Step three, treat your lawn with Revive®. Revive® acts as a wetting agent. Simply put, Revive® helps water soak into the ground, down to the root zone, resulting in less evaporation and run off.  Similar to HuMateRevive® also helps grass take up nutrients. Revive® is available in granular and liquid form. Both are effective, though Revive® granular has the added benefit of a small amount of Nitrogen. 

Step four, top dress with organic material. Top dressing is the process of applying thin layers of compost, worm castings or peat moss to your existing turf. Top dressing at regular intervals will help reduce the clay content in your turf grass soil and increase microbial population and activity. Microbes work to improve the relationship between turf grass roots, soil and nutrients. As a result, turf grass develops more vigor and stress tolerance, especially heat. A nice, thick lawn requires a health soil base. By taking the steps to build your soil, your lawn will thrive through the hot summer months ahead.    
  

Tuesday, June 23, 2020

Planting for Pollinators

June 22 through the 28, 2020 is National Pollinator Week, a time to bring focus on the importance of supporting pollinators. When we think about pollinators, the honey bee is the species that comes to mind first however it’s important to realize that native bees, butterflies, moths, flies and hummingbirds also fill a role as pollinators in our gardens. In order to attract the greatest diversity of pollinators to our gardens and landscapes, we need to supply a source of food and water and the case of native bees, shelter. 

Food for the pollinator community means nectar and pollen. The ideal plants and shrubs will produce flowers with high nectar and pollen content. Flowers with good sources of nectar and pollen include Asters, Black-eyed Susan, Columbine, Coneflower, Digitalis, Gaillardia, Joe-pie Weed, Mums, Penstemon, Sage and Sedum.  Pollinator-friendly shrubs in your garden should include Blue Mist Spirea, Lilac and Butterfly Bushes. Beyond perennials and shrubs, think about incorporating annuals, bulbs and herbs into your pollinator garden. Zinnias are bee magnets. Plant a nice bed of zinnias and the bees will come. Chives are another plant which bees love. Include herbs such as borage, comfrey, mint and lavender in your pollinator garden. Crimson Clover and other cover crops will attract pollinators  and can be worked into your garden to improve the soil once the crop stops flowering. 

To better attract pollinators, plant in clumps. This will bring a focus to your landscape and save pollinator’s energy searching for food. 

Gardening with pollinators in mind should include a source of water. A shallow pot saucer filled with pebbles will serve the purpose. Keep the water refreshed so the pollinators know they can return to the same spot every day.  Garden fountains and birdbaths can also serve as a source of water. Place some flat stones in the birdbath so pollinators will have a place to land and drink safely. For non-hive dwelling native bees, consider leaving a patch of the garden uncultivated for native bees that burrow. For wood and stem-nesting bees, hang a nesting block. With some thought and planning, you can create a destination for bees and other pollinators. 

Tuesday, June 16, 2020

Now is the Time to Treat Iron Deficiency 
 As you’re working in your garden, you may notice some plants may not be as green as you’d expect them to be this time of year. These same plants may be smaller, seemingly lagging behind others in the landscape. The leaves on the Maple tree in the front yard may be yellow instead of bright green. The plants in your garden, the trees and shrubs in your landscape may very well be suffering from a lack of iron, a condition known as iron chlorosis. Iron chlorosis is a common problem of many ornamentals, shrubs, vines and trees.

 Instead of a healthy, rich green look, the leaves of trees, plants and shrubs affected by iron chlorosis are yellow to light green, with prominent veins. In severe cases, iron chlorosis will cause the leaf to take on a scorched look. This yellowing of normally green leaves is due to a lack of chlorophyll, brought on because the plant or tree involved is lacking the micronutrient Iron. It’s important to note that chlorosis is seldom caused by a lack of iron in the soil. Iron is typically abundant in our soils, but heavy, compacted clay combined with high soil pH makes it difficult for many trees and shrubs to take up iron effectively.  Remedies for iron chlorosis include applying iron supplements in a form plants and trees can use, as well as improving soil structure, applying elemental sulfur, reducing the soil pH and building stronger root systems. Iron supplements are available in liquid and granular forms. 

Choose one that has Chelated in the label. Chelated iron is not affected by soil pH levels and as a result, is more readily available to your trees and shrubs. The most effective iron supplement choice is a complex of iron and the chelating agent EDDEHA. These supplements can be applied directly to the soil under the tree; through a series of holes drilled around the drip line; by trunk injection; by foliar application with a sprayer. The method selected depends on where the tree is planted in your landscape. To fix the problem long-term, it is necessary to combine iron supplements with soil improvements. Applying organic materials such as compost and humate will improve soil structure and reduce alkalinity. 

Each of these products is applied to the area under the tree's dripline, three to four times per year. In addition, building a more robust root system will increase water and nutrient absorption potential. This can be accomplished by applying products containing mycorrhizae twice a year. Finally, know what you’re dealing with. This shrub may look like chlorotic, but yellow leaves are normal for a Gold Flame Spirea. If you’re not sure, stop in. We’ll help you identify the problem and come up with the right solution. 


Tuesday, June 9, 2020

Now's the Time to Plant Tomatoes and Peppers


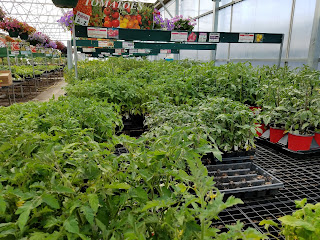
Early June is a great time to plant warm-season crops such as tomatoes and peppers. The two keys to successfully planting now are to select garden ready plants and to choose varieties that will mature before our first frost. Garden ready tomato and pepper plants feature strong root systems and sturdy stems and are ready to take home and plant in your garden or in containers on your patio or deck. 

Step two is to select varieties that will mature quickly. Our average first frost date is September 28. Last year, our first frost occurred on October 10. This tells you to choose tomato plants that will produce in approximately eighty days or less. Cherry tomato varieties such as Super Sweet 100 are relatively fast growers and will give you good harvest. Medium-sized fruit such as Celebrity or Shimmer are also good choices. Pepper plants are second only to tomatoes in popularity. Whether you’re looking for sweet, hot or snacking peppers, you’ll find garden ready plants that will mature in about seventy days. Once you’ve made your selections, it’s important to acclimate your garden ready tomato and pepper plants after you take them out of our greenhouse. This is a relatively simple, yet important step in the planting process.  


Acclimating or “hardening off” greenhouse-grown plants involves gradually exposing them to outdoor light, wind and temperatures. While you’re waiting for your tomato and pepper plants to adjust to the outside world, take time to prepare the planting site. For garden planting, this means adding organic compost to the existing soil. For container growing, choose a well-draining potting mix. To do their best, your tomatoes and peppers need to be fed on a regular basis. The presence of an OMRI seal on the package is your assurance that the contents are certified organic. If you have questions about selecting the right varieties of tomatoes and peppers, stop in. We’ll be glad to help you.  

Tuesday, June 2, 2020

Choosing a Fertilizer for Your Victory Garden


In order to get the best from your vegetable garden, it's important to feed your plants on a regular basis. This is especially true if you’re growing tomatoes and peppers. Tomatoes and peppers are heavy-feeders, meaning they require plenty of organic food in order to produce their best yields. This is especially true at this point in the season, when they’re flowering, setting fruit and trying to cope with summer’s high temperatures. There are a number of good vegetable garden fertilizers available, both organic and non-organic, so the choices may seem complicated. Start with the basics. Every garden fertilizer should list the three major ingredients on the front of the container, in this order: Nitrogen, Phosphate and Potash. The first number on the label is always Nitrogen. Nitrogen promotes plant growth. The second number is Phosphate. Phosphate helps rooting and blooming. The third number is Potassium. Potassium plays a key role in overall plant development. 

An effective organic tomato and pepper fertilizer would typically contain numbers such as 5-7-3 or 2-5-3. The number represents the percentage of each major component in the package. Note in each case, the middle number is the highest, putting an emphasis on fruit production rather than plant growth. Premium organic fertilizers will also contain elements such as Mycorrhizae and Bacillus designed to improve the soil microbiome, as well as enhance nutrient uptake. 

The presence of an OMRI seal on the package is your assurance the product has been certified organic according to the Organic Material Review Board. Fertilizers are most effective when the tomato plant can absorb them through the roots. Granular fertilizers are applied around the base of the plant at the rate of two to three cups per ten square feet. Beyond basic ingredients, fertilizer effectiveness is determined by a number of factors, including soil structure, pH and fertility. If you have questions, stop in and let’s have a conversation about which fertilizer is best for your garden.