www.theflowerbin.net

www.theflowerbin.net

Tuesday, May 31, 2022

Planting and Growing Asiatic and Oriental Lilies


With their large prominent flowers, Asiatic and Oriental lilies certainly deserve a place in your landscape. Both are strikingly beautiful and will do well in our local gardens. The question we get asked most often is what's the difference between the two lily varieties.  


Let's start with the similarities. Asiatic and Oriental lilies are some of the easiest and most reliable plants you can have in your garden. They are perennials in our area, meaning they come back every year.


To do their best, both varieties need to be planted in a location where they will receive between 6 and 8 hours of direct sun a day.  Both varieties like well amended soils that drain well. Once you’ve selected the site, amend your existing soil by adding 2" to 3" of Earth Essentials Sheep, Peat and Compost, worked in about 8". This amendment will enrich your existing soil and improve drainage.  


Now to the differences. Asiatic lilies tend to bloom earlier than Oriental lilies. Asiatic lilies are shorter, don't need staking and the flowers, while beautiful are not fragrantOnce established, Asiatic lilies will multiply rapidly in your garden.  


Oriental lilies tend to be taller than Asiatic lilies. In full bloom, Oriental lilies may need to be staked in order to support their tall, top-heavy stalks. Oriental lily blooms are fragrant, and they typically don't multiply as rapidly as Asiatic lilies do.  


Lilies are planted from bulbs. If you’re planting bulbs, place each bulb about 4" deep and about 6" apart, in well-amended soil, with bone meal mixed into the planting site. If you’re planting established lilies, dig a hole twice as deep as the container and twice as wide. Add some bone meal, remove the plant from the container and set it in the ground at the same height it was in the container. Fill in around the plant and water thoroughly.  


For your convenience, we’ve planted a variety of lilies in one-gallon containers. These are rooted out and ready to plant. There are several advantages to planting container grown lilies instead of bulbs. First, you can see the plant is healthy and thriving, which means the root system is established. Second, in many cases the plant has started to bloom, so you can see what the flower looks like. 


Asiatic lilies will provide color to your garden just as the spring blooming plants like iris and peonies are beginning to fade. Oriental lilies will begin to bloom about the time the Asiatic lilies start to slow down.  Asiatic and Oriental lilies are popular with gardeners everywhere because of their low maintenance and spectacular, long-lasting flowers. 


Tuesday, May 24, 2022

How to grow Dahlias


Of all the summer blooming bulbs, Dahlias are one of the easiest and most spectacular flowers you can grow in your garden. From mid-summer to first frost, they will flower almost continuously.


Dahlias are available in a wide variety of colors, shapes and sizes, including ball dahlias, decorative and dinner-plate dahlias and cactus dahlias. All told, there are fourteen distinct groups of dahlias.


Dahlias are planted from tubers, generally in late May through early June. This is the when the soil temperature is warm enough to safely plant your tubers.


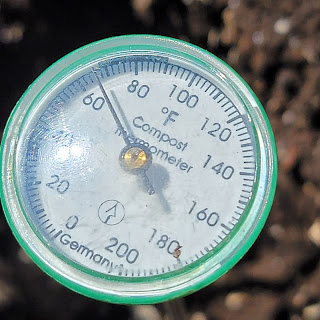
A good rule of thumb is to plant dahlias at the same time you'd plant tomatoes, when the soil temperature has reached 60 degrees F. Dahlias love the sun, so pick a place in the garden that gets the most sun during the day.  Dahlias will grow in an area where there is some shade, but the plants will be taller, and you’ll typically get fewer flowers.


When you open the package, your dahlias came in, you’ll find one or two eyes on the tuber. Sometimes you’ll find the tuber has begun to sprout. That’s okay. It’s still good to plant. Dahlias do best in slightly acidic soils. Since our Colorado soils tend to be higher in pH or more alkaline, adding organic materials will help make the soil more acidic and improve the drainage. Plan to add 3" to 4" of organic Earth Essentials Sheep, Peat and Compost to the existing soil 8" to 10" deep.  Once you’ve prepared your soil, add a handful of Bone Meal or Dutch Bulb Food and work it in a little before you plant your tubers.  The package your dahlia tubers came in can provide valuable information about your dahlia, including height.


Large dinner plate dahlias can easily reach 4' in height. Flower stalks this tall need to be staked. It’s best to place the stake when you plant your tubers. Set the tuber in the hole with the “eyes” or stalk pointed up. Next, set the stake near an eye or the stalk. Cover the tuber with soil and water deeply. As the stalk grows, tie it loosely to the stake to give it support. To do their best, dahlias need to be fed and watered regularly. Dahlias don’t need a lot of Nitrogen, but they do need Phosphorous and Potash, so select a fertilizer with numbers like 5-10-5 or 7-8-5. Fertilize your dahlias about 30 days after you plant them and again in another 30 days. Water your dahlias deeply, twice a week.


During the season, dahlias will provide forage for pollinators. Dahlias will not survive our winters, so you can elect to dig them up in the fall and store them or simply treat them as annuals and plant new tubers every spring. 


Tuesday, May 17, 2022

Tomato Planting Tips


In order to get the best production from your tomato plants, it’s important to understand four key elements: temperature, location, soil quality and planting depth. Tomatoes are warm weather plants, so temperature is an important factor when it comes to deciding when to plant. You’ll want to wait until the nighttime temperatures stay consistently above 50° F and the soil temperature measured at six inches below the surface is above 55° F before you plant tomatoes.  


Once the temperatures moderate and your tomato plants have been hardened off sufficiently, it’s time to plant.  To get the best from your tomato plants this year, pick the sunniest spot in the garden. Your tomato plants need at least 6 hours of sunlight a day; 8 hours a day is better.  


Choose a spot where you didn’t grow tomatoes, potatoes, peppers or eggplant last year. Rotating your crops every year reduces the potential for diseases such as leaf spot, blight and wilt. 


If you don’t have enough space to rotate your crops, consider planting tomatoes in containers this season. Plant a soil building crop such as peas and oats or winter rye where you grew tomatoes last year. Keeping the garden covered will protect the soil microbiome.  


Great soil is a must for growing tomatoes, so plan to amend the site with organic material. We recommend adding 2" to 3" of Earth Essentials Sheep, Peat and Compost and digging it in to your existing soil 6" to 8". This locally produced product will work to enrich the planting site. Repeat this application again in the fall.  


Once the soil is amended, it’s time to plant. In order to get the best harvest, it’s important to provide adequate space between tomato plants. Determinate tomatoes should be planted 24 to 30 inches apart. For indeterminate varieties, allow 36 inches between plants.  


Tomato plants have adventitious root systems. This means that the tomato plant is capable of producing roots all along its stem. Trench-planting tomatoes places roots closer to the surface, in the soil’s warm zone. Tomato plants will develop more roots and the roots will stay warmer through the course of the growing season. Warmer, larger roots will give you more tomatoes.


Start by laying the plant on its side for a day or so. The top will curl up, making it easier to fit. Next, dig a trench about five to six inches deep and long enough to hold your tomato plant. Place your tomato plant in the trench and add enough soil to bury the stem.


When you get to the top, gently build up the soil until the top and leaves of the tomato are upright.  


You may also choose to plant your tomatoes straight down. Dig a hole deep enough to accommodate one third to one half of the plant. Remove the lower leaves and place your plant in the hole, then back fill with amended soil.  


Please note, if you are growing grafted tomatoes, plant straight down, keeping the graft point level with the soil line. 


Add some granular tomato fertilizer such as Happy Frog Tomato and Vegetable or Natural Guard Tomato and Vegetable.  The OMRI stamp on the bag assures you these products are organic. These fertilizers feed your tomatoes and they add calcium and magnesium. Plus, they contain mycorrhizae, beneficial fungi which will help your tomato roots grow bigger roots and take up nutrients more efficiently.  Plan to fertilize your plants when you see fruit beginning to form and every two to three weeks through harvest. 


Now that your tomato is planted, give it a good drink.  Your tomato plants need to be watered deeply now and regularly through the growing season. Not watering consistently can lead to many problems including Blossom End Rot and cracking. Watering inconsistently can also cause the flowers to drop and the fruit not to set. Avoid watering your tomato plants overhead. Irrigate at the base of the plant.  Starting your tomato plants out right will lead to better yields this season.