Tuesday, September 28, 2021

Tips for Growing Garlic


Garlic is a member of the allium family, which includes leeks, shallots and onions. There many different varieties of garlic, all of which fall into three general categories: Softneck, Hardneck and Elephant garlic. Softneck garlic is the kind you will generally find in the grocery store. Softneck garlic has a flexible stalk which can be braided. 


Hardneck garlics also have a stalk (called a scape) which coils at the top. If left to mature, the hardneck varieties  will produce a flower which is actually a number of small, edible bulbs. Hardnecks dry to a hard stem, hence the name.  As a group, they generally have a deeper, richer flavor than softneck varieties do, but they don’t store as well as softnecks. Elephant garlic is the largest garlic. It is easy to peel, has a long shelf life and a mild, sweet flavor. 


Because garlic needs vernalization (a stretch of cold weather) fall is the best time to plant. Start with a good, quality bulb. Break the bulb, called “cracking” into individual cloves. Each clove will produce its own plant, containing 6-8 cloves per bulb. Garlic likes sun and well-drained soils, so incorporate a good soil amendment such as Earth Essentials Sheep, Peat and Compost into your planting site. This organic soil is produced locally. Add some organic fertilizer to the planting site, to encourage rooting. 


Plant each clove about 2” deep, pointy end up and spaced about 6” apart. Like other spring flowering bulbs, garlic planted now will set roots and start to grow. As the soil temperature cools down, growth stops and the bulb remains dormant until it's warm enough in the spring to resume growing. Garlic can be mulched in winter, after the ground freezes. Adding mulch will hold in moisture and keep the ground stable. Garlic planted in October is usually ready for harvest the next July.  When the leaves are one-third to one-half brown, it's time to dig your garlic, using a garden fork to lift each bulb.  Growing garlic in your own garden is easy and it gives you the opportunity to try varieties you might not find in the store, such as Killarney Red, California, Spanish Roja and Harvest Blend. 


Tuesday, September 21, 2021

Now’s the Time to Plant Hardy Mums


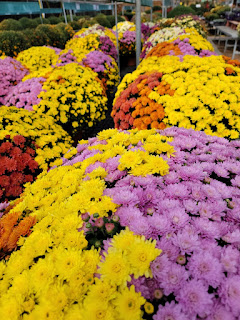
For color this time of year, it's hard to beat mums. Also called garden mums or hardy chrysanthemums, these fall favorites come in a rainbow of colors, including red, white, yellow and lavender, as well as Mumbo combinations of colors in a single pot. Hardy mums are a great choice for decorating porches and patios this time of year, but their versatility extends into the perennial bed as well.   


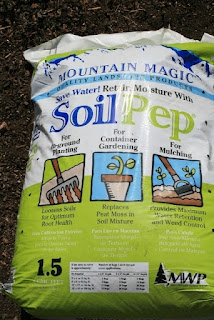
Start by selecting a spot in the garden that receives a minimum of six hours of direct sunlight. Mums planted in less than full sun will grow tall and scraggly, with reduced flower size. Next, amend the planting site with organic material, such as Earth Essentials Sheep. Peat and Compost. The planting hole should be twice as wide as the container and half again as deep. Once the site is ready, place your garden mum in the planting hole, making sure the crown of the plant is at the same level it was in the container. Fill in around the plant with amended soil. Next, mix up a solution of Root Stimulator and water the mum thoroughly. Root Stimulator will help the mum plant establish a strong root system going into winter. Mums will generally lose their top growth after a hard frost and begin to go dormant for the winter. When this happens, cut the top growth back to about six inches. Wait until the ground is cold - usually around Thanksgiving before adding a five-to-six-inch layer of mulch.  Mulch will help retain moisture and keep the ground stable. Soil Pep is a good choice for mulch.  


 Through the course of the winter, water your plants every five to six weeks. The following spring, after the threat of frost has passed, begin to remove the mulch slowly. You can also remove any dead vegetation that may remain. In some cases, you’ll find the mums have already begun to leaf out. At this point, feed your mums with a general fertilizer such as ferti•lome’s Gardeners Special, every two weeks.  


Left alone, garden mums will begin to bloom around mid-season. If you want them to bloom in the fall, it’s important to prune them on a regular basis, by cutting or pinching off the top of each stem. This will keep the plant more compact and delay blooming until fall.  The rule of thumb is to not prune mums after the Fourth of July, so there’s time for flower buds to form.  


Planted in the garden now, hardy mums will offer beautiful color as well as pollinator support for many seasons to come.  


Tuesday, September 14, 2021

Now’s the Time for Iris


While bearded irises have long been a mainstay of generations of gardeners, Iris is a genus of over 200 species and includes bearded, beardless and bulbous varieties. 


 One of the easiest ways to add color to your spring garden is to plant a selection from each variety of iris. Iris come in two forms: bulbous and rooted.  Bulbous irises are among the earliest of the spring blooming bulbs, often emerging through the snows of late winter. Their striking colors are a sure sign spring is on its way. Bulbous iris includes Dutch iris, Dwarf iris, as well as Iris reticulata, often called miniature iris. Of these, Dwarf Iris will bloom first in the spring, followed by Iris reticulata and then Dutch iris. Dutch Iris are available in shades of white, purple, yellow and blue. ‘Katherine Hodgkin’ is a popular Dwarf Iris. ‘Harmony’ is the choice for Iris reticulata.  Late September into October is the time to plant bulbous iris.  


The same holds true for the two other prominent members of the iris family: bearded and beardless. Unlike their bulbous cousins, bearded and beardless iris are planted from roots or more correctly, rhizomes. While the bulbous irises are smaller in height, the rhizome types are taller, with larger flowers.   


Whichever variety you choose, the planting requirements are the same.  Select a site in the garden that will receive full sun. Once you’ve selected a sunny site, plan to incorporate 5 inches to 6 inches of organic material with your existing soil. Earth Essentials Sheep, Peat and Compost is a good choice. While you're at it, work in some Bone Meal or Dutch Bulb Food. Used at planting time, these fertilizers will provide the nutrients necessary to promote good root development.  


Plant your bulbous iris point end up about 4 inches deep, then cover with soil. After planting, water the bed thoroughly.  Your bulbs will start rooting right away. As the temperatures cool down, the bulbs will go dormant. When the soil warms up in the spring, your bulbous iris will wake up and begin to grow and bloom. After flowering, the foliage will fade away and the bulb will remain dormant until the following spring. Once in place, your bulbous iris should bloom for many seasons.  


When planting bearded iris, it’s important to know there is a “front and back”, a toe and a heel. The leaf indicates the heel side. Iris will grow in the direction of the heel, so keep that in mind when you're planting, especially if they're going to be growing along a path or fence. Another important factor to remember when you're planting your iris rhizomes is to avoid planting too deep. Iris do best when planted so the top of the rhizome is right at the soil level or just thinly covered. If you plant iris too deep, the leaves may develop but chances are the plant won't bloom. In turn, you’ll want to plant Siberian iris deeper than bearded iris, covering the rhizomes with two to three inches of soil. Siberian iris should be placed two feet apart.  


Even if you decide to grow nothing but bearded irises, you can enjoy a remarkable range of color and by choosing early and mid-season varieties, the bloom season will span several months. Some bearded irises are “rebloomers”, blooming again in the summer, fall or winter. Additional water and fertilizer applied during the summer months encourages them to bloom again.  


Tuesday, September 7, 2021

It’s Dahlia Show Time


For fall color, dahlias are hard to beat. This is because very few plants offer as wide a variety of sizes, shapes and colors as dahlias do. From giant blooms over 10 inches in diameter to micro blooms under 2 inches, over 20 different forms and all colors of the rainbow other than blue, there’s a dahlia that will work well in your garden. All of these flowering possibilities grew out of the early work by Swedish Botanist Andreas Dahl. Dahlias can be grown successfully in containers or in the ground and will bloom from late-summer to first frost. 


Dahlias are one of the most spectacular of the garden flowers and regardless of your experience level, there’s always something to learn about them. There’s no better opportunity to strengthen your growing skills than at the Colorado Dahlia Society’s 2021 show, hosted by The Flower Bin on Saturday, September 11 and Sunday, September 12. The theme of this year’s show is Four Seasons of Dahlias and includes dahlias in Winter, Spring, Summer and Autumn. Arrangement entries will center around the seasons and their colors. For example, Winter Wonderland will feature white ball dahlias, representing snowballs. If You’re interested in participating in the show, entries will be accepted from 7:00 AM to 10:00 AM, Saturday September 11, at The Flower Bin. There is an Amateur Class and an Open Class.  You do not need to be a member of the Colorado Dahlia Society to enter. 


Each dahlia submitted must include two leaves along with the blossom, in order to be accepted into the judging. Vases and show tags will be available. Members of the Colorado Dahlia Society will be available from 7:30 to 10:00 AM to help finalize any entries. 


There is also a photography contest that centers on our show  theme.  Following the judging, the show will be open to the public, at approximately 12 noon. The show is free and represents a great opportunity for you to enrich your dahlia knowledge. If you’re a grower, we invite you to enter some of your blooms. If you’re interested in getting started growing dahlias, stop in and visit with the members of the Colorado Dahlia Society. For more details, visit the Colorado Dahlia Society website: https://coloradodahlias.net/