Tuesday, November 26, 2013

Fall Rose Care


Roses vary in hardiness, but all roses need some attention going into winter. This is because our winter temperatures can fluctuate widely and moisture levels will vary from month to month. Begin by cutting canes back about 1/3rd, to about 24" to 30". This is not an exact measurement, but it’s important to cut canes now to prevent damage from winter winds. Prune to the outward bud, so that future growth is toward the outside, away from the center of the bush. Don’t prune climbing roses at this time. Secure the canes to the trellis and spray with Wilt-Pruf® to prevent the winter winds from drying out and damaging the canes.

Remove any spent flowers or rose hips at this time. Clean up fallen leaves and petals from around the rose bush, to prevent black spot and other diseases from wintering over. Dusting the area with Sulfur will also help control disease and insects trying to winter over. Grafted roses need mulch to protect the graft bud from injury during the winter.
Own-root roses are typically better at surviving winters than grafted roses. What’s an own-root rose? These are roses that grow on their own roots, often Heritage or Old Garden Roses. Grafted roses have a bud or swelling just above the roots, where two different roses have been joined together. Grafted or own-root, all roses will benefit from mounding mulch up around the canes. This will serve to keep the ground stable and to prevent damage to the rose as the ground freezes and thaws during the course of the winter. This will also help retain moisture.
Soil Pep makes an excellent mulch for roses, as well as other perennials. It stays in place well and breaks down slowly, gradually improving the soil.
Adding Rose Collars will help keep the mulch in place through the winter. Water your roses (and other shrubs, trees, perennials) during the course of the winter. Pick a day when the temperature is above 40
°. Water around mid-day and confine your watering to the base of the rose. You want to get water to the roots, not the top of the rose. As always, you are welcome to bring your gardening questions or concerns to the Diagnostic Center in the Hardgoods section of the store.   


Tuesday, November 19, 2013

How to control those pesky black gnats on houseplants.


Fungus gnats are tiny creatures that invade your plants, living in the soil, getting in your coffee cup, drifting across your computer screen. More than a nuisance, fungus gnats can harm your plants, as the gnat larvae can feed on the roots of your plants. Their life cycle is very short: the adults live about 10 days, but in that time can lay up to 200 eggs.
Fungus gnats are generally more noticeable in the fall and winter months. When you bring in those houseplants that have spent the summer outside, you bring the bugs in also; fungus gnats, as well as other insects. Repotting your plants can also introduce fungus gnats, especially if the potting soil has a lot of peat moss in it.
Always use a quality potting soil, when you plant or repot your houseplants. Potting soils with moisture controls in them can make getting rid of fungus gnats more difficult.  To control fungus gnats, make sure you are not overwatering your plants. As the days get shorter in the winter, houseplants grow more slowly and require less water than they did in spring and summer. The soil stays soggy longer and attracts bugs. You need to adjust your watering accordingly. Make sure there is no standing water in the saucers under the plants. Fungus gnats can breed here.
Some products you can use to control fungus gnats include Yellow Sticky Traps. The adults are attracted to the color yellow and then stick to the trap. To control the larvae in the soil, apply products such as Food grade Diatomaceous Earth (DE).
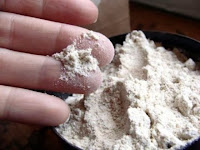
This can be mixed into the first few inches of soil. Any adults or larvae that come in contact with DE will literally be sliced up. Mosquito Bits contain BTi, another naturally occurring insecticide that can be applied to the soil surface then watered in.
Systemic Insect Granules are another effective insecticide, when applied to the soil surface and watered in.  Both of these products effectively kill the larvae in the soil. Insect sprays include Insecticidal Soap, Neem Oil and Permethrin. A good time to spray is right after you water your plants. That is when you’ll see the adults scurrying around on the surface of your plants. Fungus gnats can be a nuisance in the fall and winter, but with the right treatment, they can be controlled. Bring your plant questions to The Flower Bin Diagnostic Center We’ll identify the problem and offer you the right solutions.  

Tuesday, November 12, 2013

How to plant and grow amaryllis.


Amaryllis are easy to grow and they add brilliant color to the holiday season. Begin by selecting a premium quality bulb. Generally, the larger the bulb the more stems it will produce and the more flowers per stem.

Once you’ve selected a bulb, choose a container, one with drainage. Amaryllis bulbs like to be snug when potted, so select a pot that is just slightly larger than the bulb.

Amaryllis will grow in plastic pots, however, amaryllis can get top-heavy, so clay or ceramic help keep the bulb upright while its blooming and it looks better. Double potting is also an option. Just slip the plastic pot into a more decorative one, as shown here.
Add enough potting soil to the bottom of the pot, so that about 1/3 or so of the bulb is exposed. Fill in the rest of the pot with potting soil,then water thoroughly.
Place the pot in spot where the temperature stays above 60°. The warmer the temperature, the faster the bulb will root and bloom.


Check soil moisture and water when the first inch or so is dry. Generally, you should see flowers in 7-10 weeks. Start fertilizing the bulb after the first set of leaves appear. Use a water soluble fertilizer designed for blooming and rooting and feed the bulb every two weeks.


Growing amaryllis in stones and water is easy and you get to watch the root development. Traditionally, amaryllis bulbs are forced in glass containers. Select a vase or jar slightly larger than your bulb and add river rock, marbles, and decorative glass pieces. Trim off any existing roots and place the bulb on top of the marbles or rock. Amaryllis can get top-heavy when they bloom, so add some more rock or marbles around the bulb to help keep it in place. Forcing amaryllis in water takes a lot of energy from the bulb, more so than forcing in dirt.  What that means is it may take many seasons for the bulb to recover enough to bloom again. Pinch off the flowers after they have bloomed and cut the flower stalk down to the bulb, once the flowers have faded. At this point, large bulbs will often send up a second set of flowers. Once the second set of flowering is done, remove the flower stalk, but leave the foliage in place. The green leaves of the amaryllis gather food to replenish the bulb. 

Tuesday, November 5, 2013

Gardening tips for November.


November gardening tips.
 
 
Time to get serious about cleaning up the garden. Begin by removing any plant supports, such as trellis or tomato cages. Next remove all the spent plant material from the garden. Dead plants, old fruit and vegetables, including tomato plants and diseased plants should be disposed of. Plant material that looks healthy can be composted, adding organic material to your garden soil. This would include fall tree leaves and grass clipping from the lawn. A great way to clean up leaves from the lawn is to put the catcher on your mower and gather the leave while you mow the lawn. All this material can go right into the garden. It will break down over winter and is a great addition to your garden soil. This is also a great time to incorporate peat moss, compost, raised- bed amendments into the soil. Preparing garden soils now is easier because the soils are generally drier, it means less work in the spring and a generally earlier start to the garden. Next, turn your attention to your perennial beds. Look for obvious trouble spots, such as plants that exhibit any dead, diseased or damaged branches. Clean up any fallen leaves and other debris from around rose bushes to prevent diseases from wintering over. The same goes for aspen trees. Black spot, powdery mildew and other diseases can winter over and infect plants in the spring.
Most of your actual pruning can be accomplished with a good set of hand pruners. For larger branches or canes, use loppers.


You can prune roses back to about 30 " now, but avoid severe pruning. We’ll talk more about fall rose care in a future article. Perennials such as Catmint (Nepeta), hardy hibiscus, mums, bronze fennel, hostas, columbine, daylilies, phlox, peonies, salvia, veronica, and yarrow can be pruned to the ground. Spring flowering shrubs such as forsythia and lilac form their flower buds soon after they bloom. If you prune them now, you will cut off most of the flowers. Better to prune these bushes shortly after they bloom, next spring. Ornamental grasses can be pruned now, however they will add interest to your winter garden, so you can wait and prune them in early spring before they start to green up. Artemisia is best pruned in the spring. Butterfly bushes can be trimmed lightly now, but wait until late winter to do any serious pruning. These are general guidelines. If you have specific questions, contact us at 303-772-3454 or stop by the Diagnostic Center in the Hardgoods section of the store.